I thought I could use the water and foliage assets from this pack for my own project, as it matches the forest/ river aesthetic which I intend to create. I also think this could give me a lot of creative flexibility as it uses branches and stems to create unique structures.
I can use animal blueprints and animations to bring life to my scene and add more depth and natural elements such as animal life. This also matches the forest theme.
Here are some more tree/ foliage packs which I could use, this is a good pack as it includes different assets based on seasons, so I can create a winter, autumn, spring, or summer scene.
This is a beautiful pack and the assets are fairly new, as it has recently been added for free to the Unreal Marketplace. The quality is very high and it looks very realistic and visually appealing.
I thought this pack would be beneficial as I do intend on adding water to my scene, maybe as a river or a lake. This pack gives me some interesting water materials.
I have previously used this before in other projects, therefore I am comfortable using this pack. I think they are very beautiful trees and look stunning in the light and fog.
This pack appealed to me a lot due to the warm lighting, as it creates a sense of comfort and a soft lighting effect which I can incorporate into my scene.
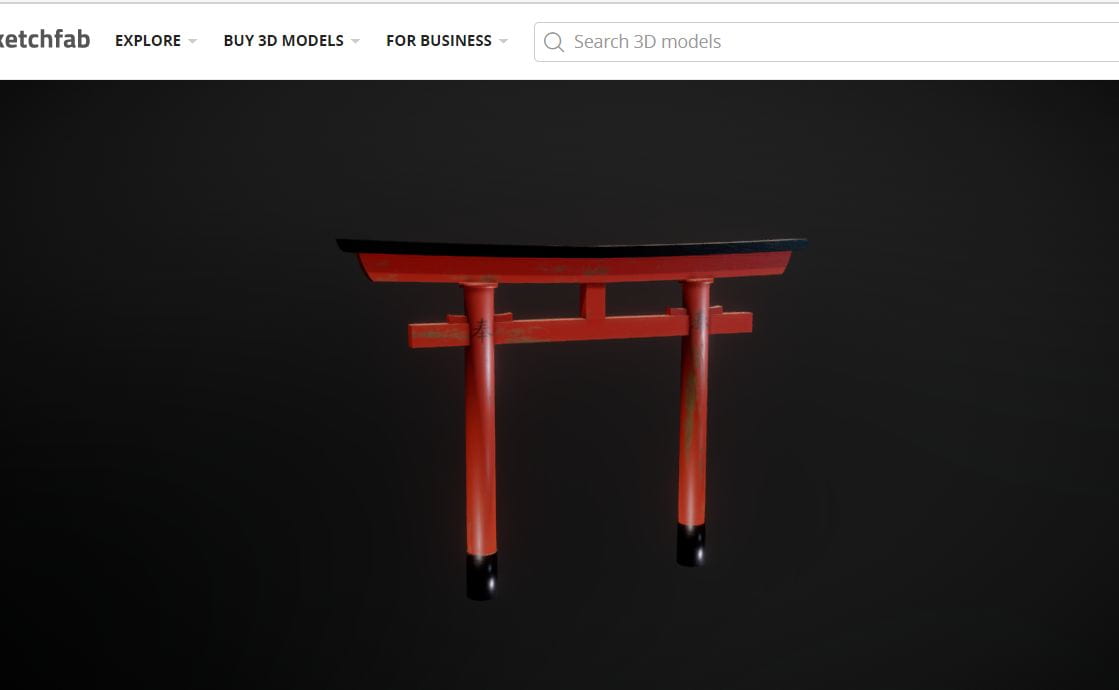
This gate could add a smaller, and more impactful touch to the artifact, as it is not too big and can be used to accentuate certain areas of the scene.
“Japanese Torii Gate” by Sahir Virmani is licensed under Creative Commons Attribution. https://skfb.ly/6RISt To view a copy of this license, visit http://creativecommons.org/licenses/by/4.0/.
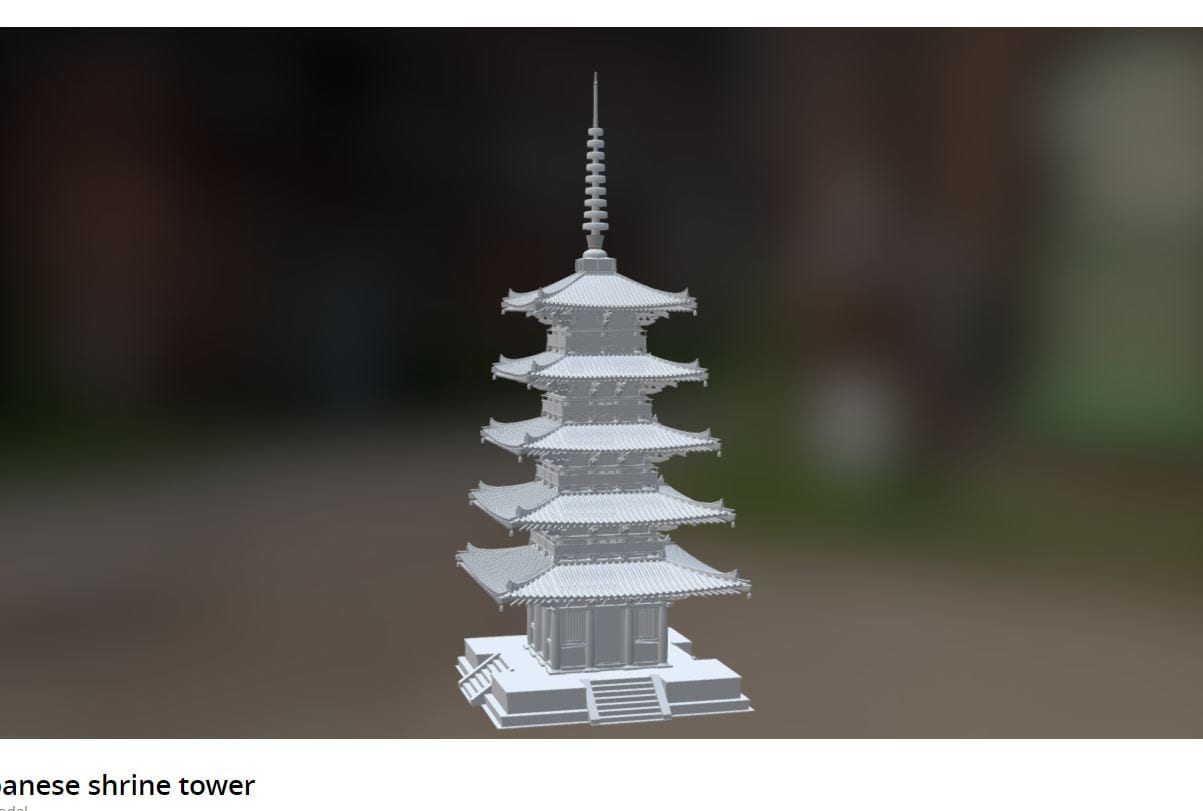
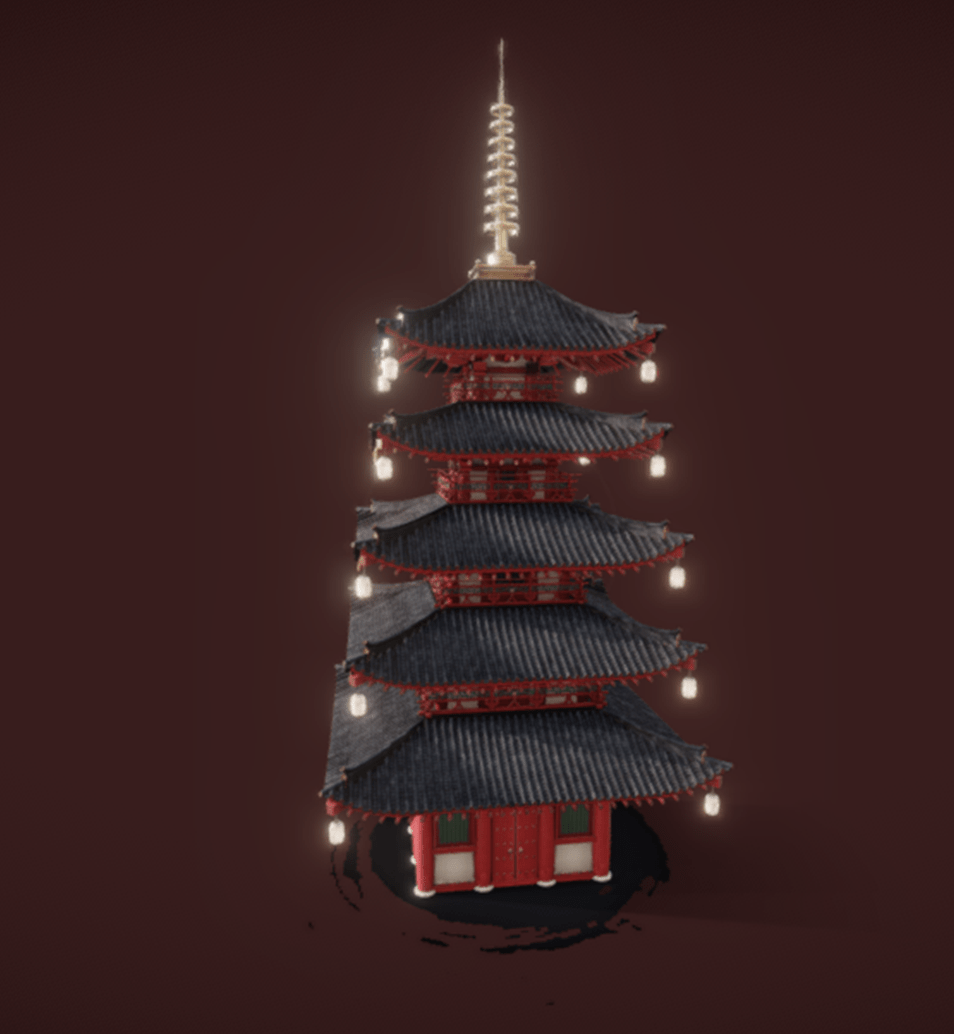
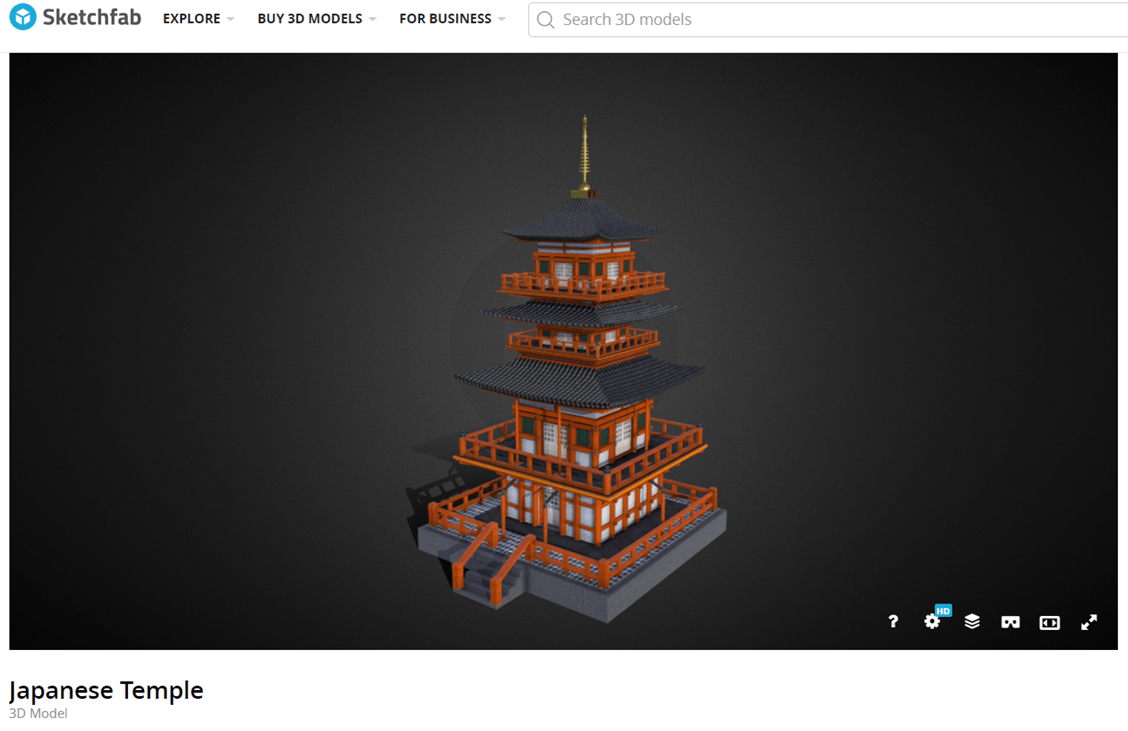
This temple is subtle, yet bold enough to be a key element to the scene. Focusing on Japanese architecture, this model will bring a lot of detail and personality to the scene.
“Japanese Temple” by Jainesh Pathak is licensed under Creative Commons Attribution. https://skfb.ly/6Twyt To view a copy of this license, visit http://creativecommons.org/licenses/by/4.0/.
This resource is a video tutorial series for beginners, understanding the basics of using Substance Painter. From this tutorial I have learned:
How to start a new project
How to access texture material IDs
How to use fill layers and paint layers
Navigation hotkeys
Smart materials
Exporting texture files for Unreal
How it will help you with your intent and desired output?
This tutorial will help with my output as it teaches me how to use the required software and increase the speed of my workflow, therefore allowing me to have a higher quality of work and knowledge. This means I am able to have assets with better textures and materials.
How it measures up against industry use of the tool/skill?
This series is made by the official Substance Painter account, meaning that it is the industry-standard method of using this software.
(Jayanam, 2020)
What it is and what did you learn?
This resource is a Youtube tutorial that taught me how to export textures and importing and plugging in the texture maps in the Unreal Engine.
How it will help you with your intent and desired output?
This helped me with my intent and desired output by teaching me the process from Substance Painter to the Unreal Engine, which is a vital part of the project, ensuring that I can use my custom assets in the level design.
For my level 2 Digital Media project, I investigated level design in the Unreal Engine. In this project, I focused on gathering research and deeply looking into this subject area. I really enjoyed this as I explored some new skills and became more familiar with the software. This inspired me to go deeper into level design and even encouraged me to create my own assets. I have included the Project 2 Digital Media link to support my findings in this project, as I have reflected and used this blog throughout my project.
I previously used this pack when I was experimenting with the Unreal Engine and I want to use it in this project as I think it will help with my final artifact a lot as it enables me to easily build a landscape and paint on different materials and textures such as grass, mud, puddles, sand, rock, etc. It also comes with an alpha mask brush so I can create realistic mountains and hills while sculpting in Unreal.
This video showed me that using World Machine for the landscape heightmap was not the best solution for my project, regarding my timeframe, preferred result, and flexibility.
In this video, you can see I used the Brushify pack to build the landscape. This was beneficial to my project as I can reference this when I come to build the landscape for my scene. The specifics I can use from this are:
Adding the landscape material to the level
Creating layer blend files
Using the alpha texture brush to sculpt the terrain
Painting different materials onto the terrain such as mud, grass, sand, etc
At the start of this video, I experimented with the foliage tool and importing assets into the scene. I learned how to add meshes to the foliage tool where you can alter the settings to make more realistic foliage and arrangement of trees, such as size, positioning, density, collision, etc. I also learned how to place singular assets such as rocks. I also wanted to add a river/ lake but hadn’t worked out how to make it look realistic yet.
In this experiment, I explored the achievability and realistic potential output I could create using free assets I have found through Quixel Bridge (Megascans) and what I have been given, such as the Brushify auto materials and alpha brush. I also used free music and sound effects online which I used for the output. I have attached the links below. I have recorded the process of creating this, similar to the tutorials by Maverick where I did not include a tutorial on how to recreate this, but visually shared how I achieved the final output. I thought this would help with my development because I could test how much I have learned through the tutorials and resources I had found. By trying it out, I am able to develop skills by practice, as well as research. It also made me feel more confident about my future projects, as I will be able to take what I have learned through this experiment and make it better. Also by experimenting, I can solve problems, which I may have not found from just watching a tutorial or reading about it.
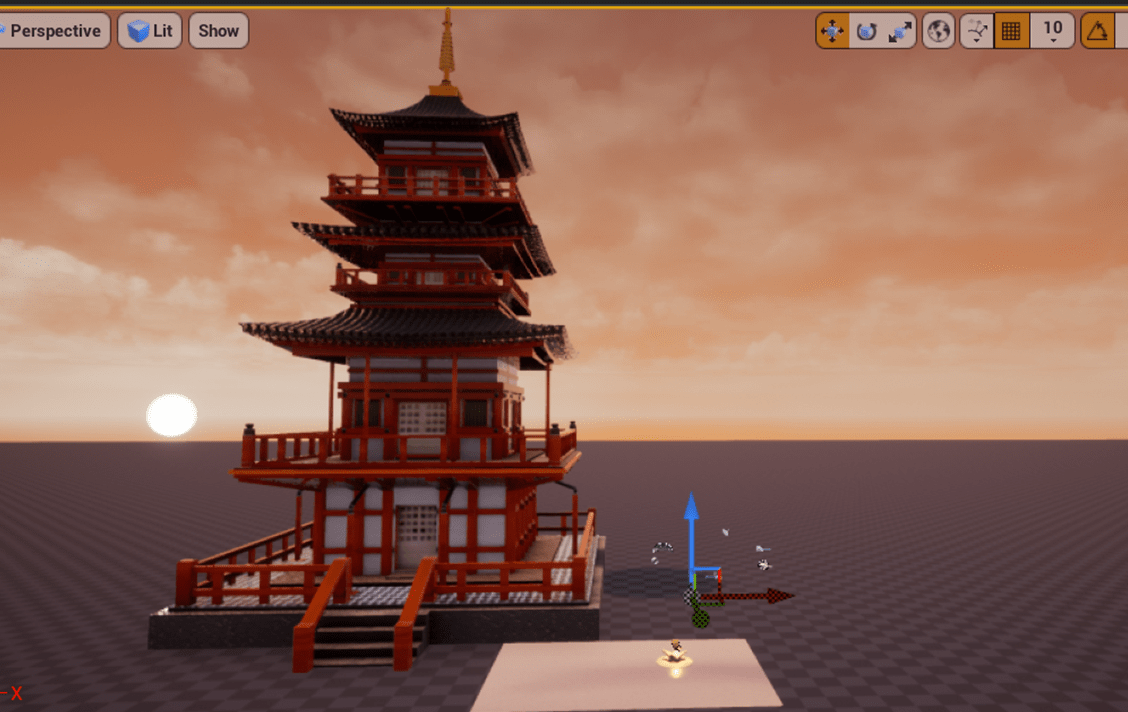
I learned how to create a landscape, paint the landscape, and add foliage, import 3D assets, meshes, and animations. I also learned how to add lighting and fog effects, as well as playing around with the bloom/ post-processing settings which I learned in the Mountain House post, to make the scene stand out and look more aesthetically pleasing. I found the lens flare effect and added a slight flare to give it a little something extra.
Video Tutorials/ Resource Review:
(Unreal, 2020)
This tutorial is useful as it teaches all of the essential steps in creating a landscape-level design in Unreal.
(Unreal, 2018)
This video helped me learn how to use exponential height fog, lighting, and post-processing which positively impacts my work.
(Harle, 2016)
(Gamefromscratch, 2019)
This video explains how to use the Procedural Nature Pack. This would be beneficial if I used this pack for my scene.
(Cirillo, 2017)
I decided to learn a little guitar tune to add more depth and make my scene stand out. It would also contribute to my intentions of creating a digital meditation space.
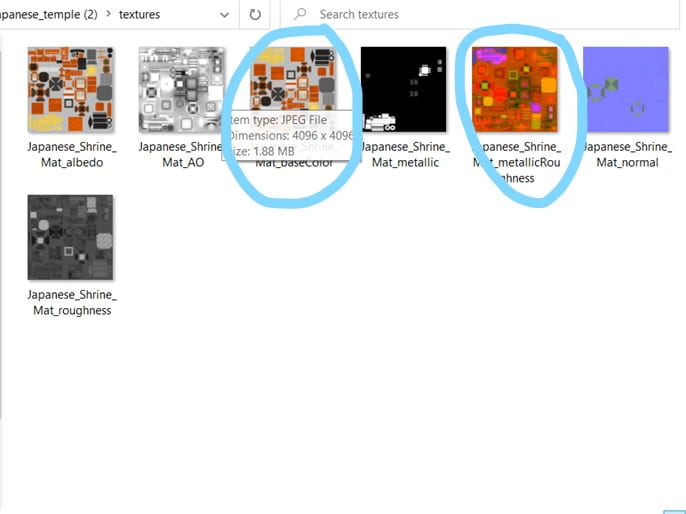
I found this image helpful in understanding the production pipeline, and the process of texturing a 3D model.
LinkedIn Learning Course
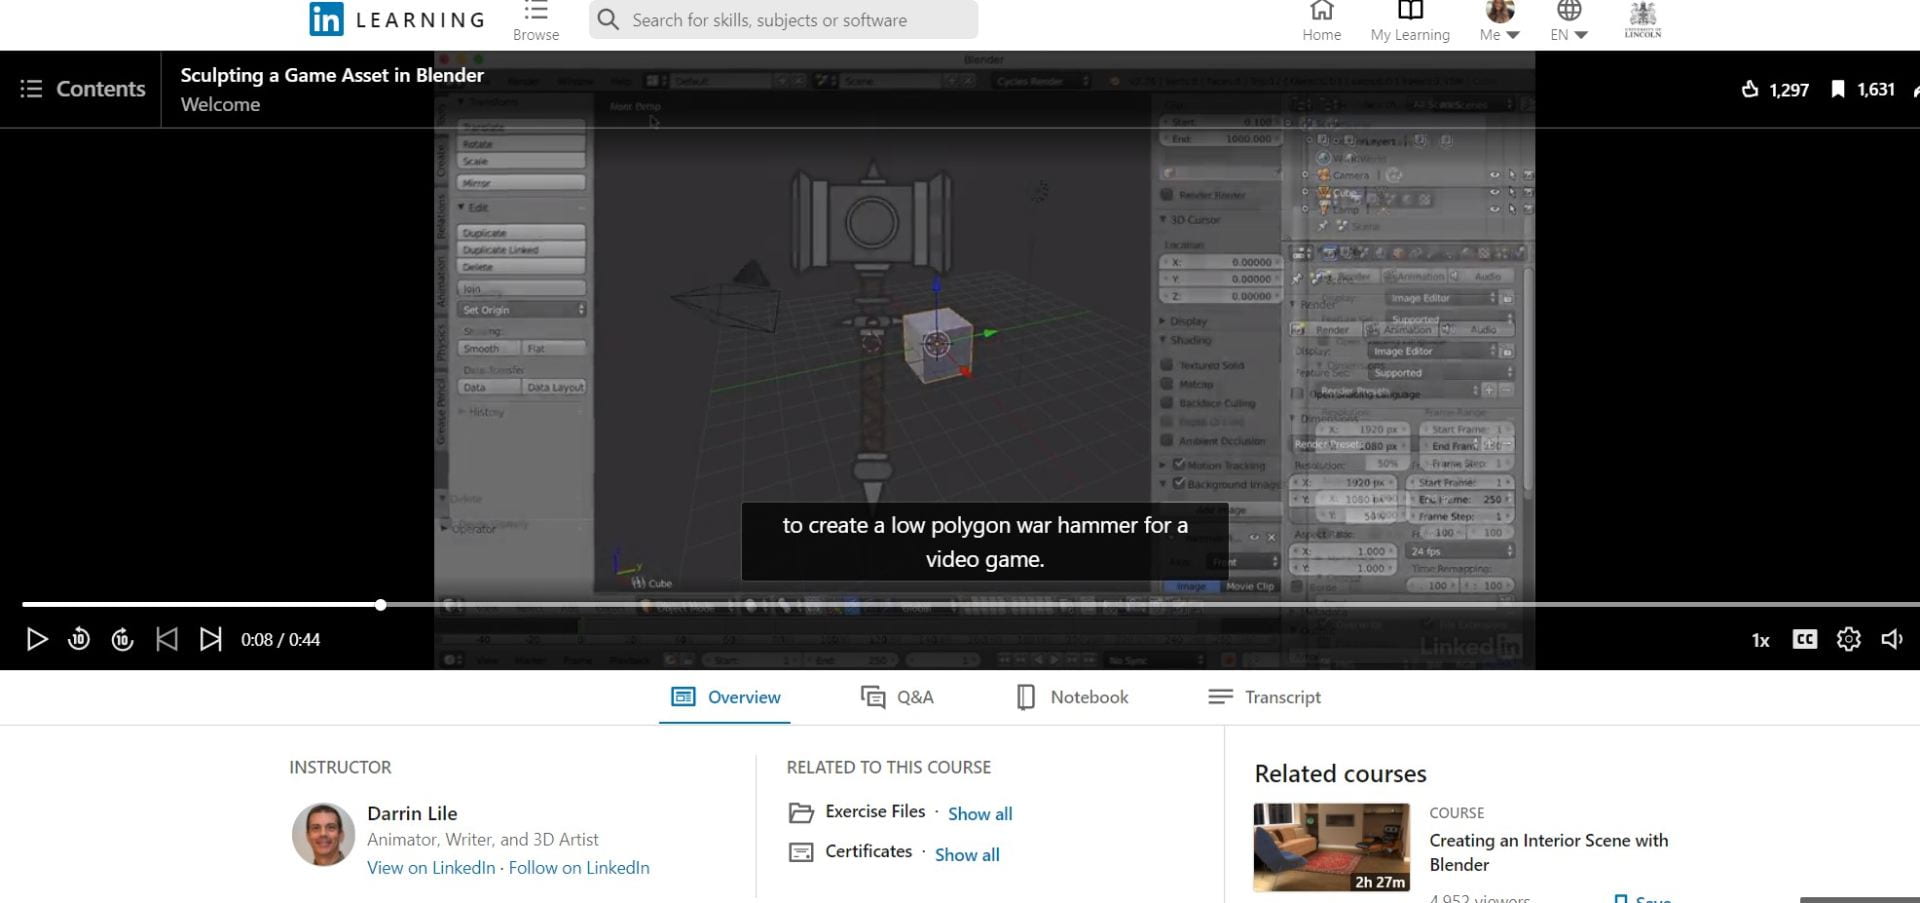
I found a course on LinkedIn Learning for building assets for Unreal in Blender. The course duration is 1hr 41mins. Here are the link and screenshot to the course:
I have also included the Certificate of Completion to show proof of the course:
(Figure 14)
What it is and what did you learn?
This course shows the process, in detail, explaining how to build an asset in Blender for the Unreal Engine.
The skills I learned include:
3D Modelling Basics
Loading a Background Image
UV Mapping
Sculpting details
Baking and applying textures
How it will help you with your intent and desired output?
This course will help me with learning the process so that I can go on to model my own assets for Unreal.
What it does well?
The main area where this course excels is regarding the level of detail and explanation. I found this tutorial very easy to understand and the narrator does a very good job at simplifying the process.
Where it falls short?
I later found out that the version of Blender was too old and everything I learned was for the previous version of Blender, therefore I needed to watch a more recent and updated tutorial.
Which specifics can I take into a production project and how?
The specifics I can take into a production project are the overall pipeline and process of creating a 3D Model. The overall course was educational and effective in explaining what I need to do in order to build a 3D asset. I can take this knowledge and apply it to my own work, and just keep updated with the required software and updates.
How it measures up against industry use of the tool/skill?
As it is a LinkedIn Learning course, it means it provides industry-level knowledge, meaning that I can use this in a professional project.
Blender’s Tutorials
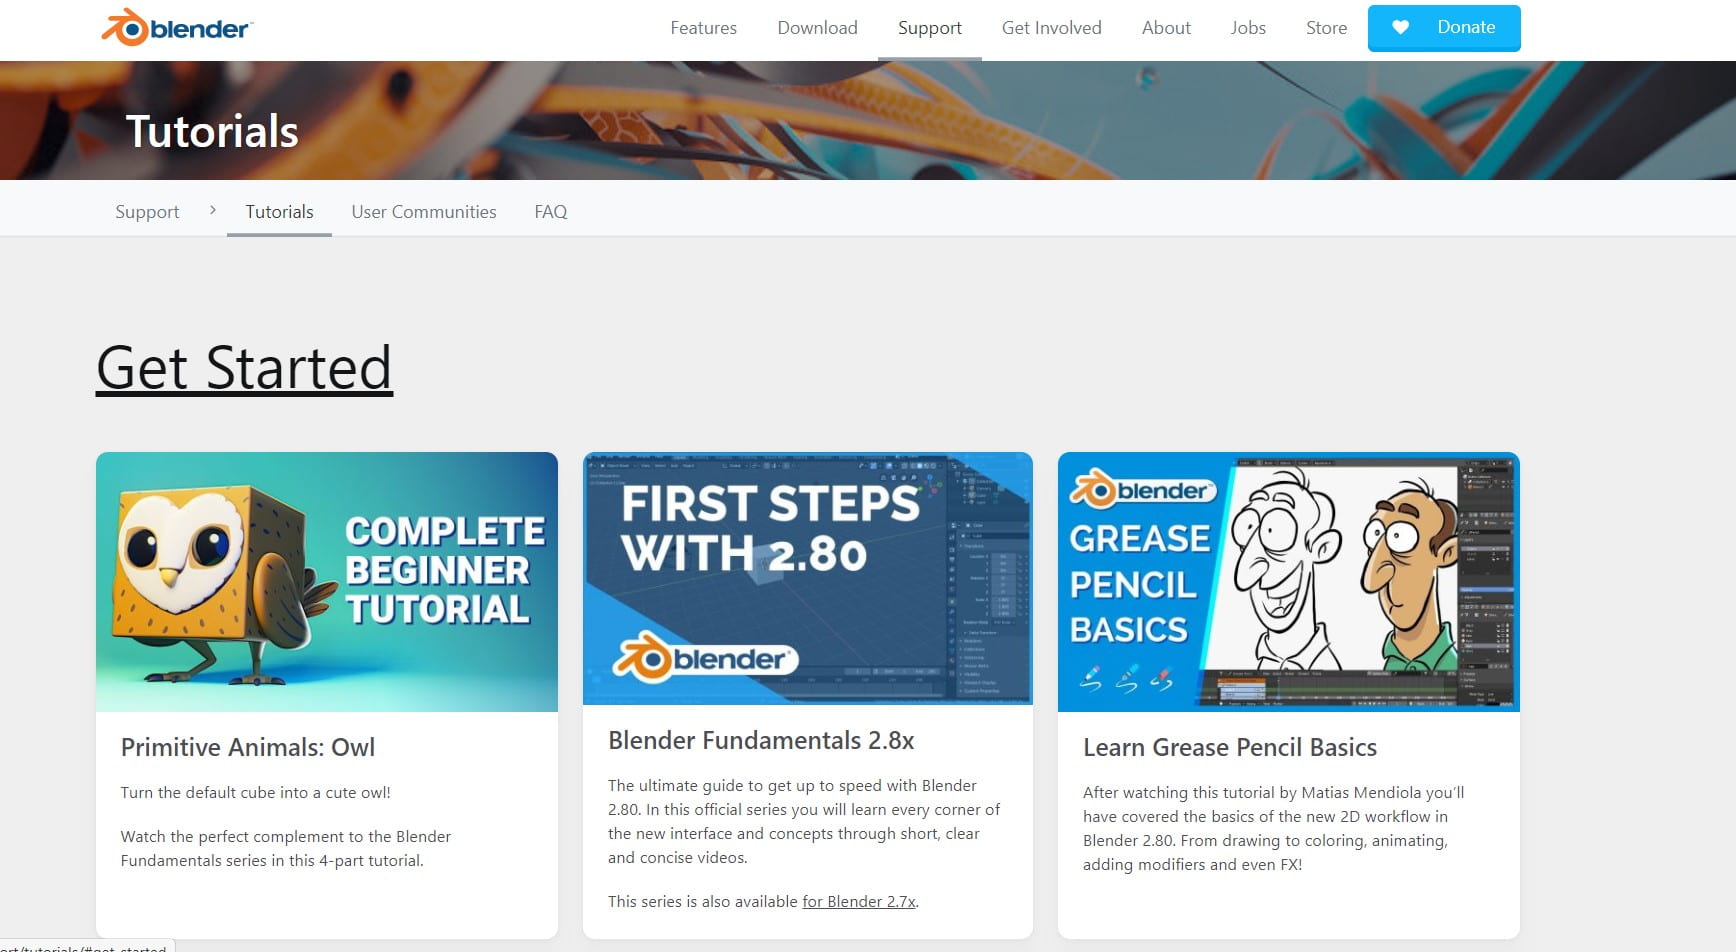
To ensure that I was learning the correct software version, I went onto Blender and chose the ‘Help’ and ‘Tutorials’ section, which opened an external page with a number of tutorials on YouTube.
(Figure 15)
(Blender, 2016)
What it is and what did you learn?
This video teaches the basics and controls in Blender for the most updated version. It even explains what Blender is used for.
The skills I learned are:
Basic navigation in Blender
Basic modeling tools
Adding meshes
Manipulating meshes (scale, rotation, position)
How it will help you with your intent and desired output?
This was actually a very beneficial tutorial as it made my overall workflow with Blender a lot easier. I found basic navigation and manipulating meshes harder than usual to understand because of the hotkeys and the updated layout of settings in Blender.
How it measures up against industry use of the tool/skill?
This tutorial is from the official Blender website, therefore it is an industry level artist narrating the video.
YouTube Tutorials:
(Guru, 2020)
What it is and what did you learn?
This is a very beginner Blender tutorial from a very talented artist. It shows the basic process of 3D modeling in Blender.
What I mainly learned from this:
Adding a background image as a reference
Modeling based on an image reference
How it will help you with your intent and desired output?
I didn’t realize how easy it is to import an image into the scene as a reference so this video helped me a lot, as it means I can reference my asset on a sketch or image sourced from google. This will improve the quality as I will have more guidance on what I want my asset to look like.
How it measures up against industry use of the tool/skill?
The artist is very talented and has an industry level and is very experienced in Blender, therefore learning from him is very effective in practicing a professional approach.
(Effects, 2020)
What it is and what did you learn?
This tutorial is based on creating a flower asset in Blender. The skills I learned from this are:
How to manipulate a shape to form a petal
Hotkeys to speed up the process such as R-Y (rotate on the Y-axis), TAB (switch to edit/object mode)
Subdivide modifier
Solidify modifier
Apply transforms
How it will help you with your intent and desired output?
As I wanted to create a flower water lantern, this was very beneficial to building the petal shape in Blender.
In the process of building my asset, I only used the first half of the tutorial to get the shape of the flower petals. To improve, next time I will use the whole process when I have more time to make the flowers a better quality regarding texturing in Blender.
How it measures up against industry use of the tool/skill?
The level of quality of this flower was very impressive and measures up to industry standard. The artist was also very familiar with the software.
“James Brisnehan discussed in great detail his huge UE4 project Villaggio Toscano talking about level design and assembly, modeling in Maya, texturing with Substance tools, foliage creation, lighting, and polishing.” (Brisnehan, 2020)
What it is?
James created an Italian village scene in the Unreal Engine. The skills he worked on include level design, 3D modeling, texturing in Substance Painter, Foliage, detailing and decorating the scene, and lastly, lighting and polishing the scene. He was studying Game Design and wanted to gain enough skills to make him employable and demonstrate industry standard work. In the article, he explains his thought and technical process of creating this level in Unreal and you can visualize the progress through the imagery he provides.
What is the artist’s style/ inspiration?
The artist clearly has a talent for natural outdoor scenes, as proven in the level of quality in his work. In his previous work, he created a Bonsai tree and a Merlin’s Cave scene. Both contain strong natural elements and assets such as trees, architecture, and photographic composition. The artist’s style is very bold and creative. This project was inspired by small Italian towns with cute, romantic architecture. It has a very art nouveau style with elegant and feminine themes as featured in the signage, props, and colors.
What exactly will you learn from it and how will it help with your project?
From this case study, I can see the technical and artistic progress and development for a similar project to mine. The final output/ artifact has a similar level I aspire to recreate in my work. This project allows me to know and understand the steps required to get to the final product, as well as setting a visual goal for me to work towards. I can also learn the industry level of skill required for a project like this, and how it measures up to industry tools/ quality.
What do you like/ dislike about this?
I really like the post-processing and lighting in this project, the soft, warm lighting effectively complements the scene and creates a romantic aura within the level design. I love the realistic and impressive detail and quality of the 3D assets, especially that they were made by the artist as well. It ensures that the assets match the desired aesthetic and bring history and life to the level. To add a cinematic touch and to creatively feature all of the hard work that has gone into the project, the artist could incorporate video into the article by making a cinematic sequence with audio to bring the visuals and audio together for an even more interesting experience and a more intense connection with the artists work.
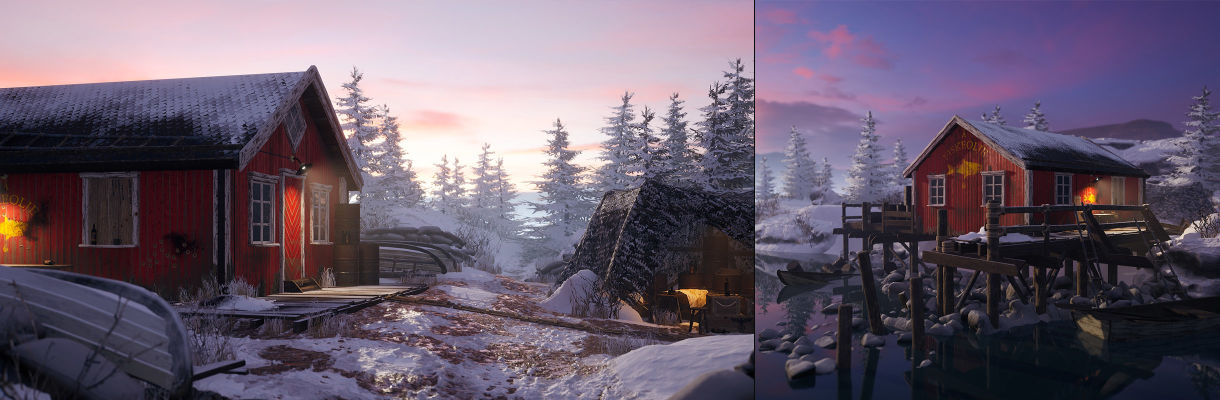
“Adam Rzatkowski discussed in great detail the production of his UE4 environment Operation Claymore and the mindset he re-approached the initially unsuccessful project with.” (Rzatkowski, 2020)
What it is?
The artist Adam Rzatkowski created a scene in Unreal using a new approach, he did a lot of research on the building and architecture. He also used his skills in 3D modeling to create his own 3D assets for the scene, such as the building and surroundings. He also worked on the textures in Substance Painter and used Blender for his 3D modeling.
What is the artist’s style/ inspiration?
The architecture is the main focus of the artist’s work, Adam’s work is strongly based on 3D modeling and creating the main assets. Some of his previous work includes a Hobbit Hole building, a futuristic sci-fi scene, and a space leaf blower. The Operation Claymore project is inspired by a World War 2 commando raid carried out over the area of Lofoten, Norway. The landscape is inspired by a winter mountain/ lakeside environment.
What exactly will you learn from it and how will it help with your project?
This case study is relevant to my project as the artist has a very similar approach to me, and uses the same software I will be using for my project. Such as Blender, Substance Painter and Unreal. I like this project by Adam because he explains his thought process and the struggles he has faced with his work. He also includes a project reflection which helps give me a personal and informative understanding of the struggles I may have for this project.
What do you like/ dislike about this?
I like the use of directional and point lighting to add more detail to the scene, as it looks different at different times of the day, therefore representing reality. I really like the still renders for this scene, the photographic composition is very complementary to the asset placement, making it look aesthetically appealing and the snowy theme suits the building architecture nicely, creating a unique element to the scene. I also love the colors in the sky as they are subtle yet beautiful.
“Time lapse of an environment created inside Unreal Engine 4 by 3d artist Tom Adams. Created using assets from the VR title Unhallowed: The Cabin.” (Studios, 2019)
What it is?
The artist shows the process of building a cabin scene set at night, through the form of a timelapse video, he said it took him around 3 hours to make, which shows he is highly skilled in the software.
What is the artist’s style/ inspiration?
Tom Adams has previously worked on 3D models such as scene props like old books, street modular buildings, coke cans, and more. His work is typically based on street props, which makes this scene unique for him. His style focuses mainly on small details and bringing props to a scene to complement the aesthetic.
What exactly will you learn from it and how will it help with your project?
From this project, I can specifically take the artist’s technique to record his process to visualize the technical and artistic steps taken to reach his desired result. I also really like the use of height fog and light post-processing to get the soft glow and add depth and mystery to the scene. I also learned how to create a pond/ lake in Unreal from watching how the artist works.
What do you like/ dislike about this?
The most appealing aspect of this scene is the power of the lighting. The soft glow emerging from the inside of the building, shining out onto the pond and the mysterious fog creating a magical illusion. The artistic skill in this project is very impressive as the scene is simply stunning. The asset placement allows for effective photographic composition and height difference adds variety. I like that the artist recorded the whole process and uploaded it as a timelapse video, this allows me to see the steps required to get to the finished artifact.
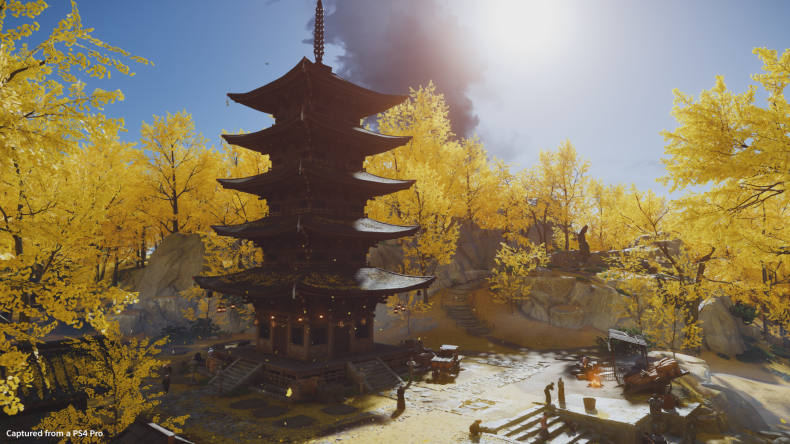
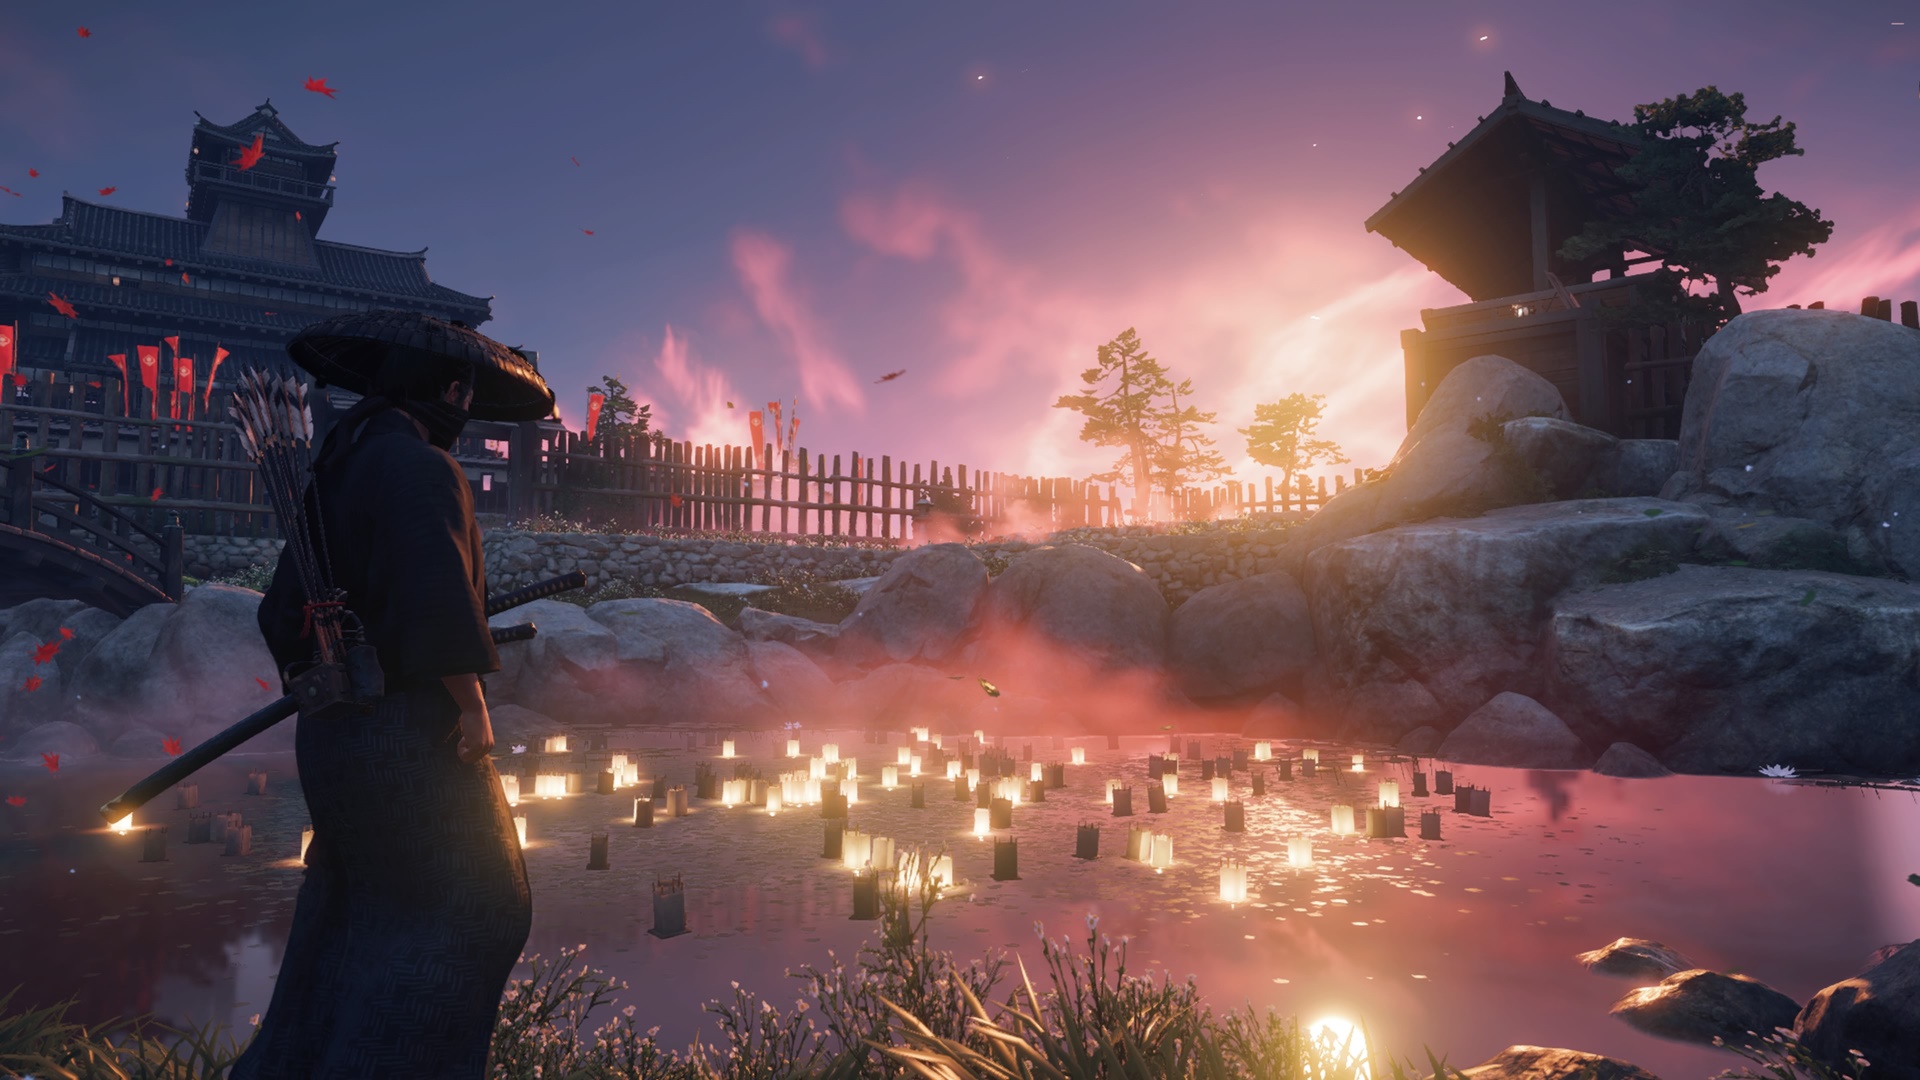
“Tsushima is on the brink of destruction. In the wake of a crushing defeat at the hands of ruthless Mongol invaders, noble samurai Jin Sakai must sacrifice everything to protect what’s left of his home and people. As he embarks on an epic adventure for the freedom of Tsushima, he must set aside samurai traditions, embrace unconventional methods, and forge a new path—the path of the Ghost.” (PlayStation, 2020)
What it is?
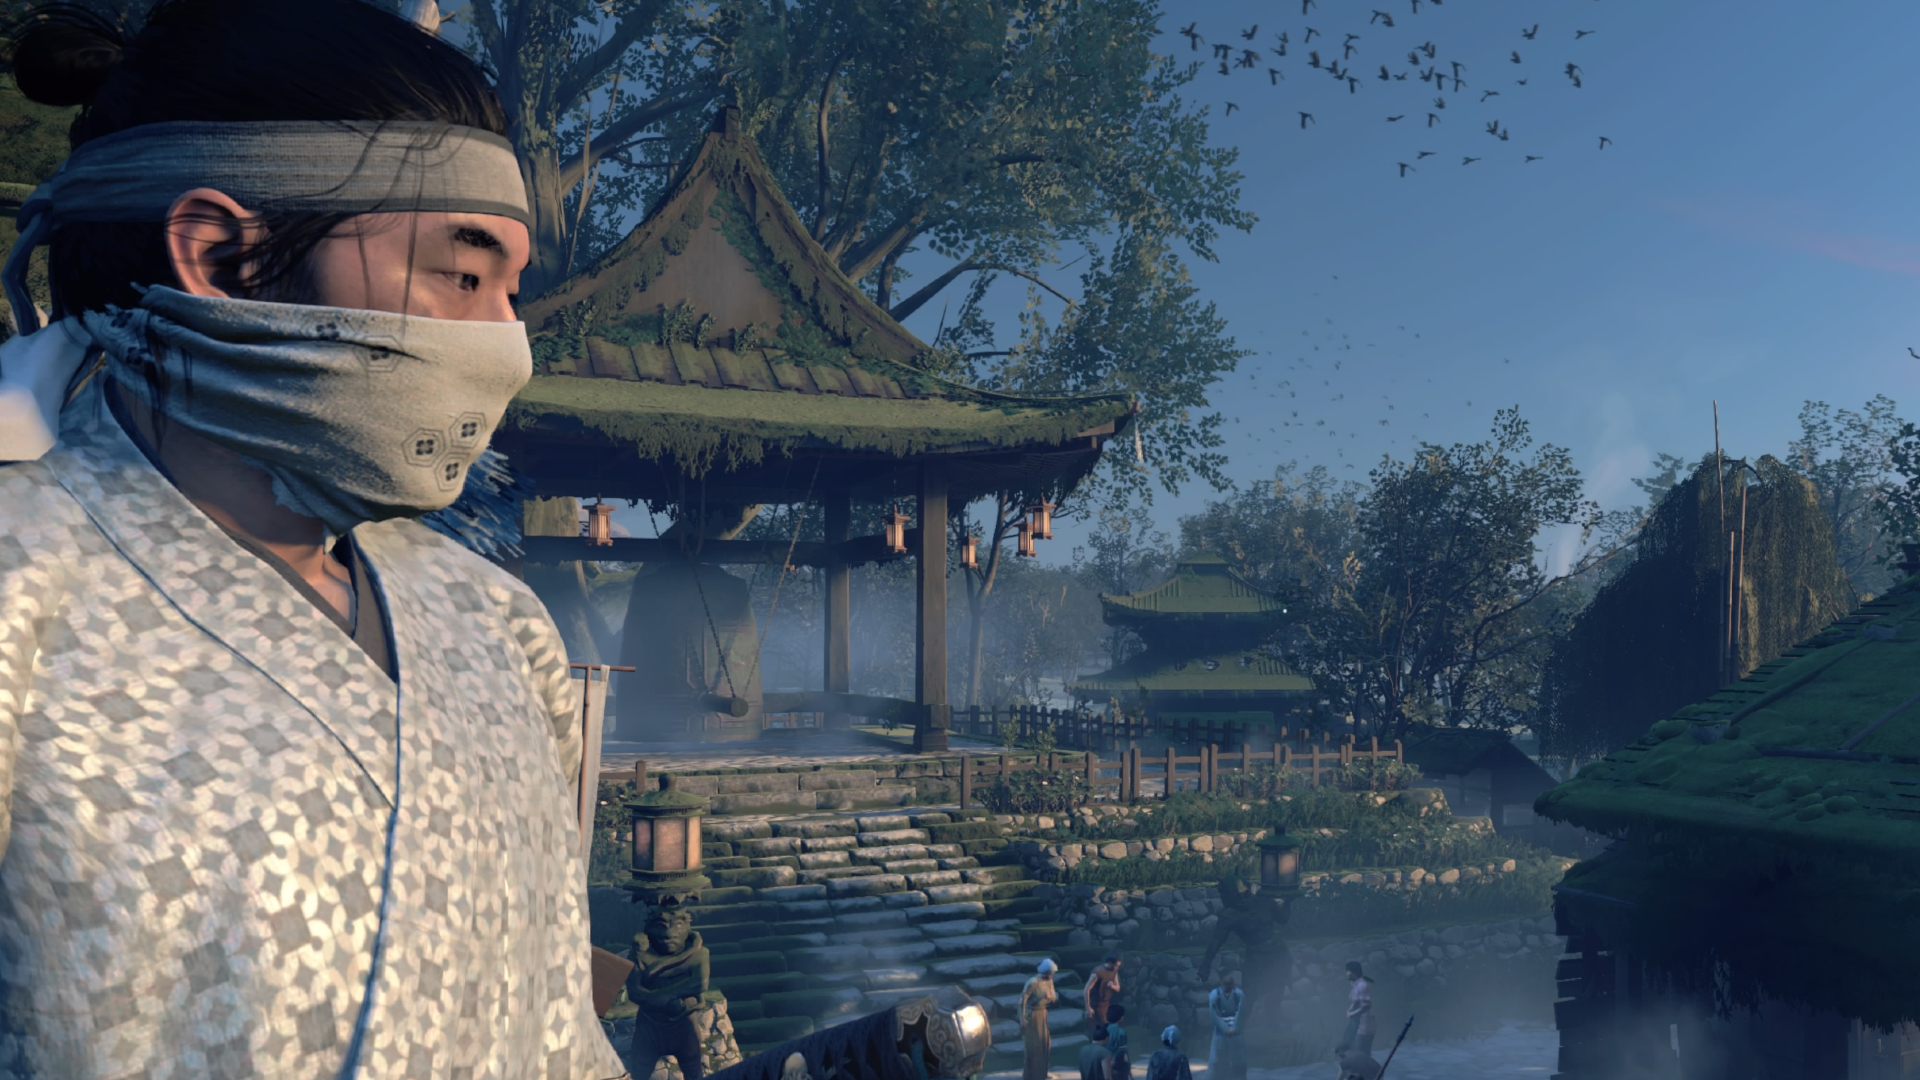
Ghost of Tsushima is a game by Play Station which incorporates Japanese architecture. The visual detail and quality of this game represents beauty due to the impressive level design and props/assets.
What is the artist’s style/ inspiration?
The style of this game is strongly inspired by Japan. Japanese temples and architecture, colorful forests, soft lighting such as lanterns and candles.
What exactly will you learn from it and how will it help with your project?
I am inspired by the artistic elements of this scene, such as the Japanese assets, nature elements, soft lighting which I intend on incorporating in my work.
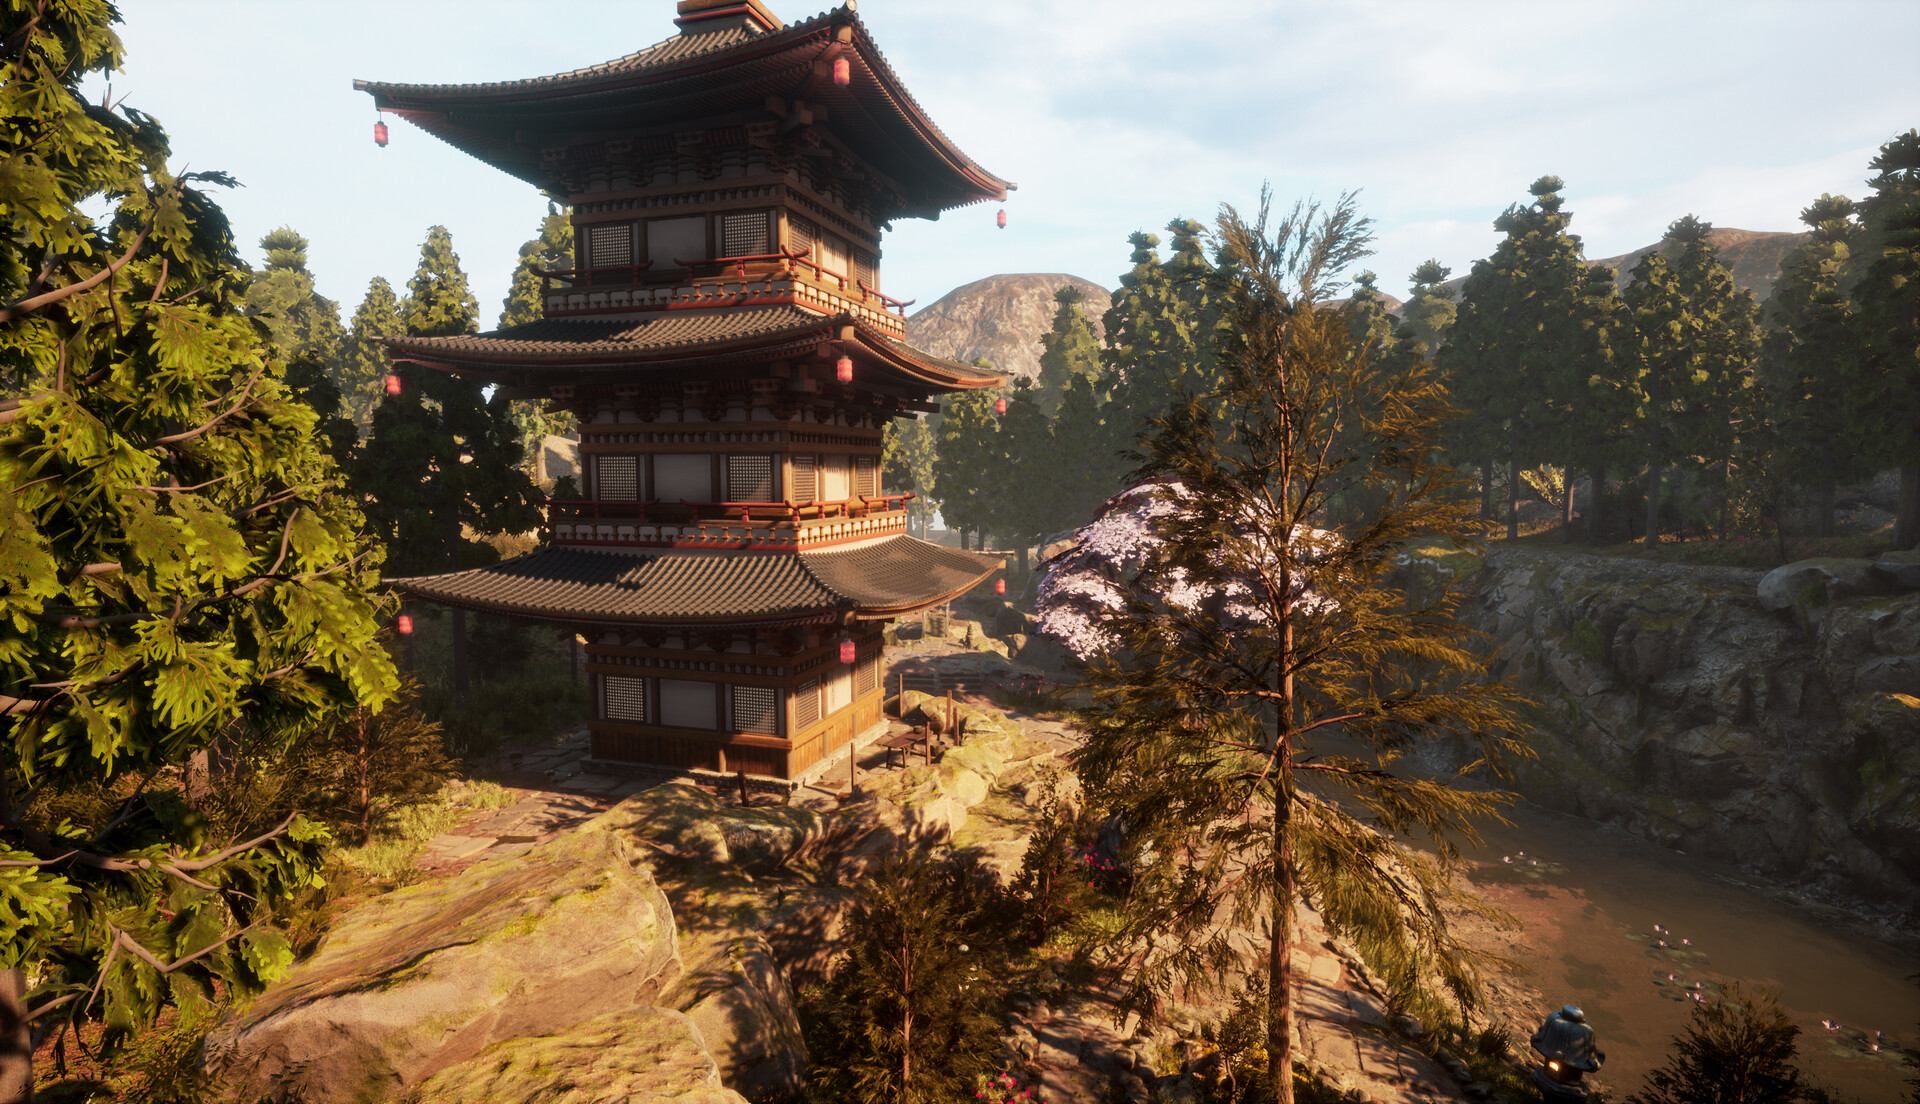
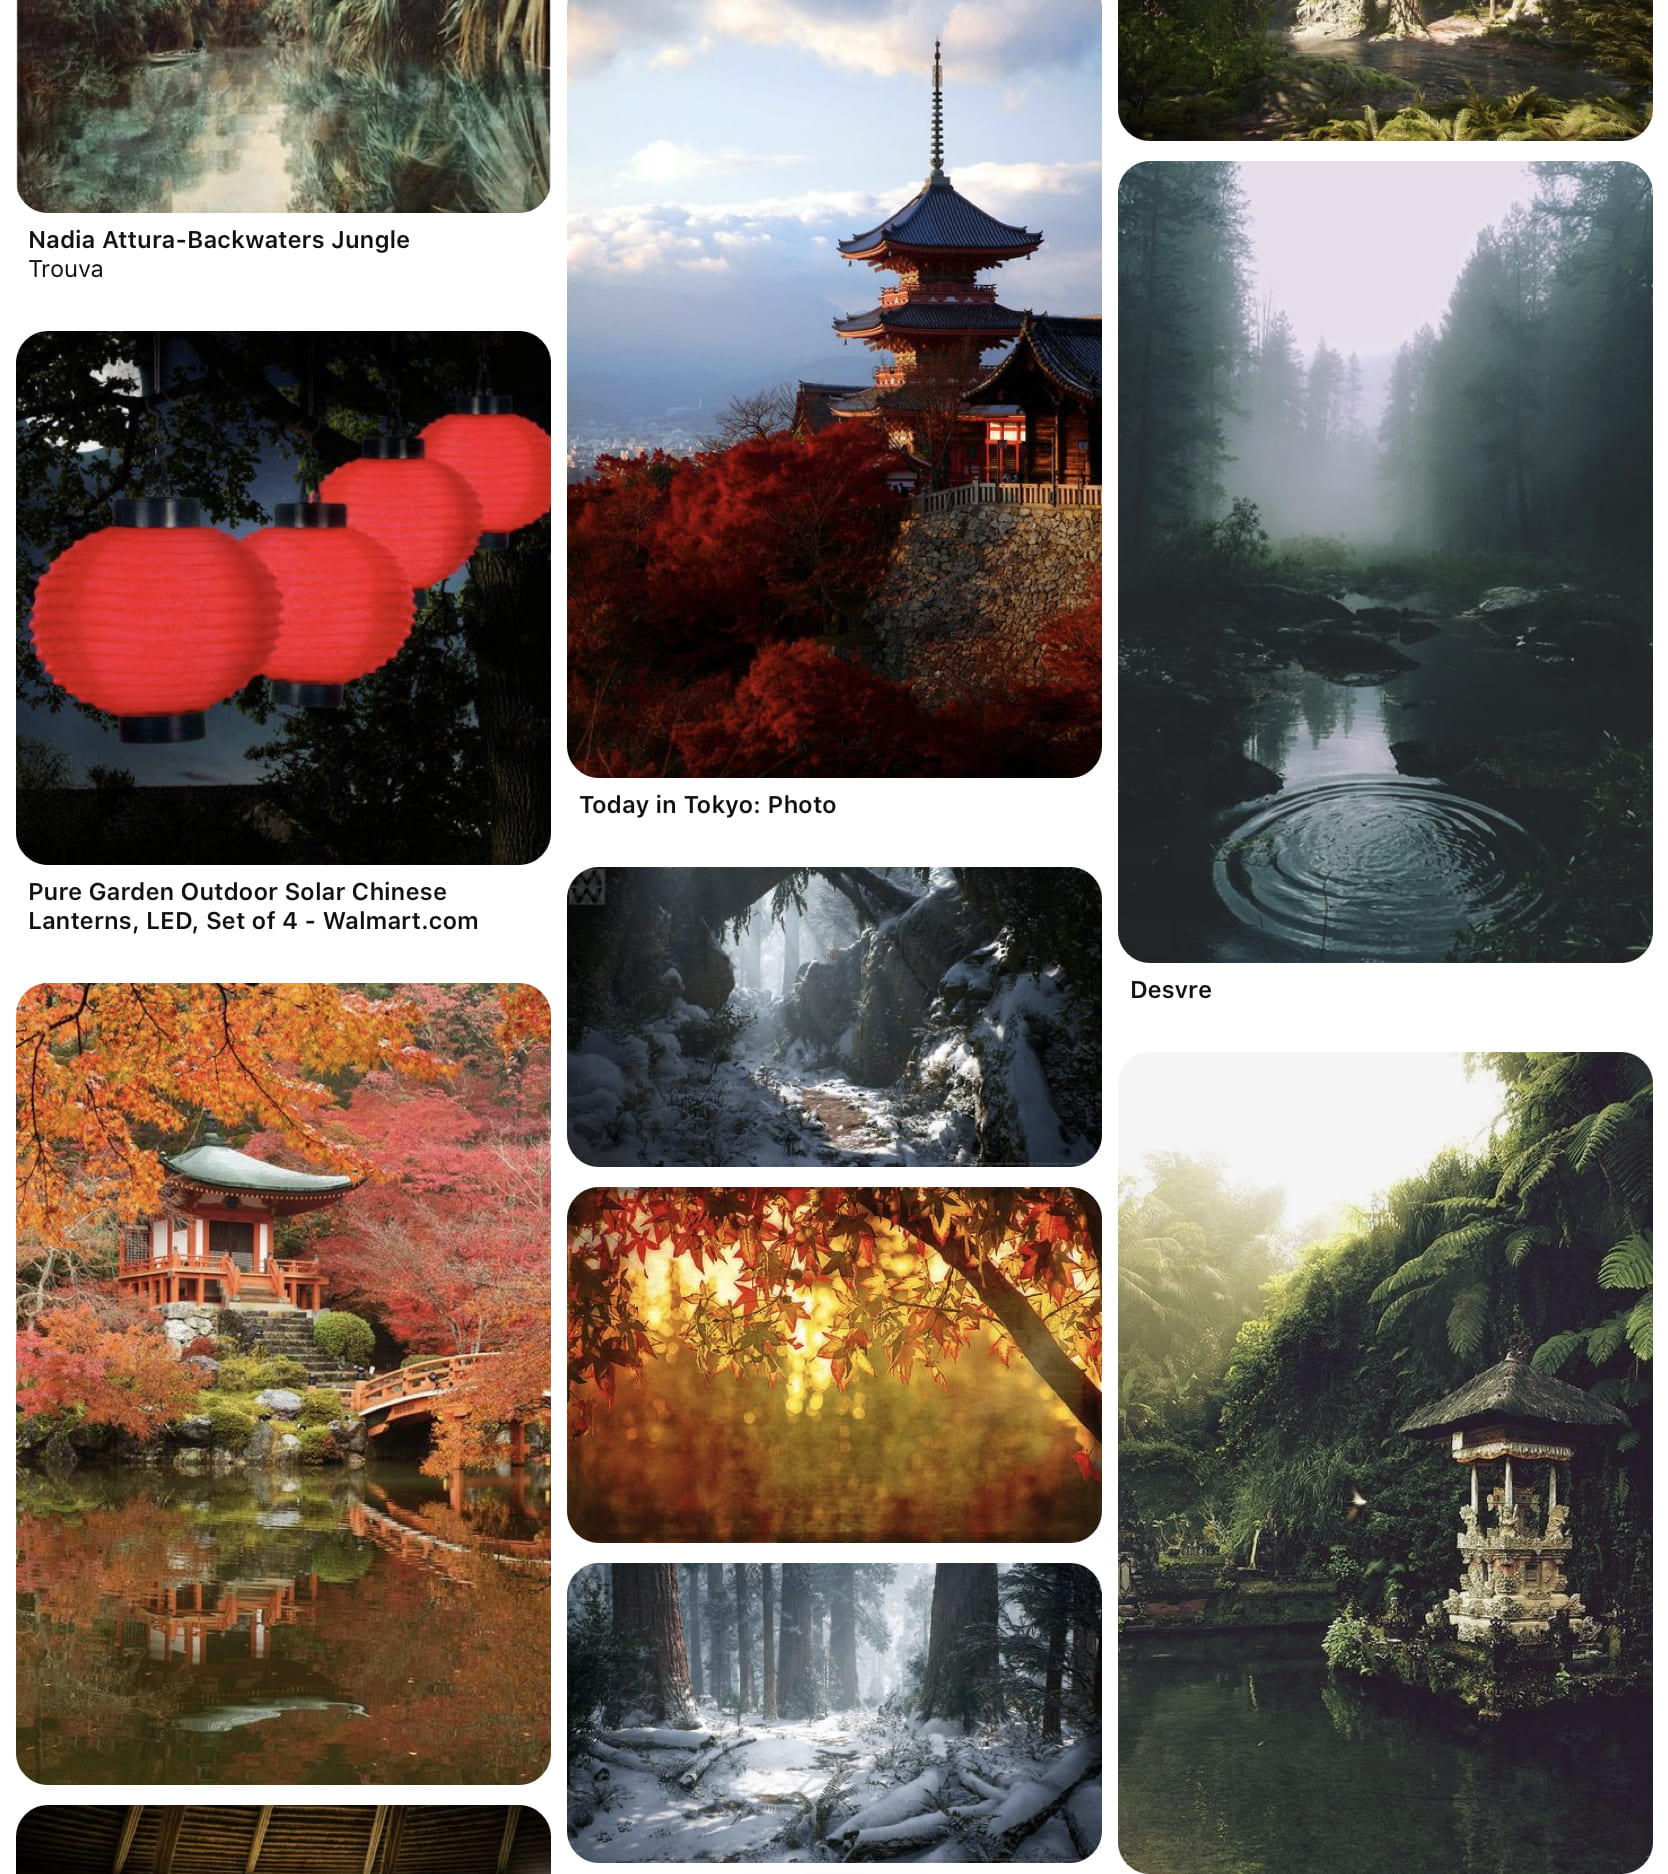
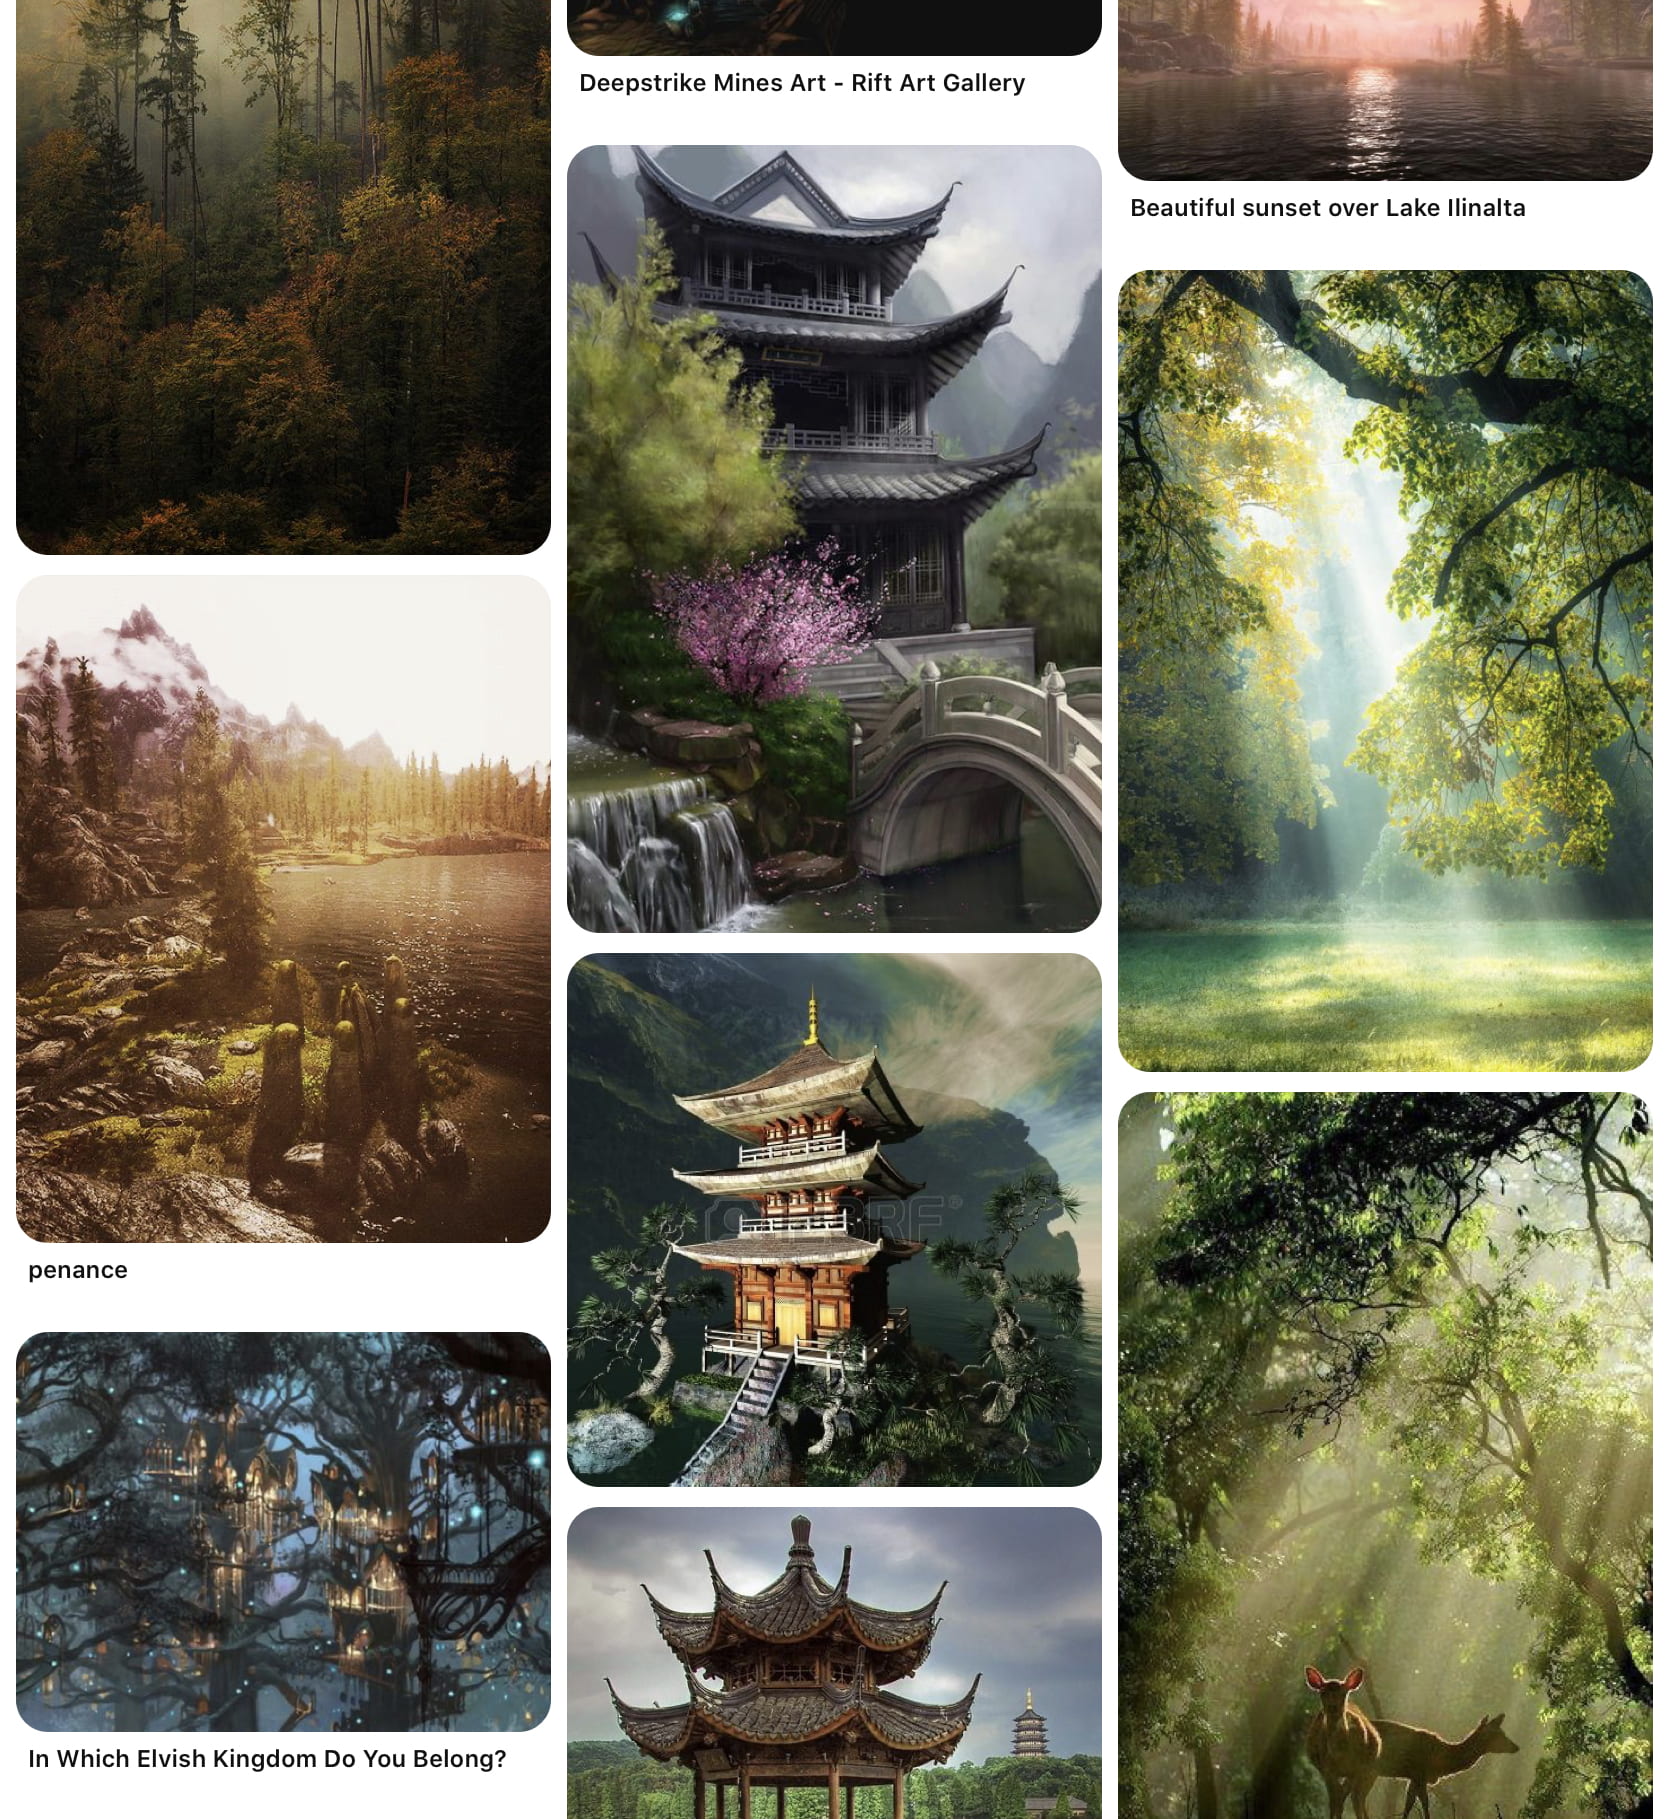
The imagery chosen for the mood board represents the artistic intentions of the artefact. I like the mystical Forrest aesthetic, with atmospheric fog and soft lighting. The traditional Chinese / Japanese / Balinese style temple with pond/ river surroundings, creates a tranquil and peaceful environment. My intention is to create a digital meditation space, therefore such imagery will be used to inspire my scene. I want to incorporate Chinese lanterns into the scene, to create a warm hue lighting effect and add an extra element to the level.
(Figure 3 and 4)
I will research into Asian styled temples and architecture as I associate them with meditation and spiritual/ religious retreats. A safe and calming place to pray, reflect and meditate. I want to bring in elements of nature into the scene through elements like water, earth and air. I will do this by setting the temple amongst trees, water and using lighting and fog effects.
“I was recently very fascinated by Japanese architecture. After looking back at the last ArtStation challenge I got really inspired to create an environment with the Japanese theme. I started with a concept by Mengxuan Li. After doing the block out of the main palace I decided to place a small shrine behind it and got very fascinated with it. I decided to get rid of the big palace and only use the small shrine to make a peaceful sanctuary in the woods. I really enjoyed working on this project and fell in love with Japanese architecture.” – (Březík, 2019)
I have previously researched this project in my Level 2 studies. This case study has inspired a lot of my artistic intentions for my project. I remember seeing this last year and I loved the work and aesthetic. I want my work to inspire others, as this inspired me, therefore it is fitting that I include this into my research.
What it is?
Student Tomáš Březík created a scene in UE4 inspired by Japanese architecture and nature. This beautiful scene was created in his free time, as he wanted to challenge himself and create something based on his interests and fascinations.
This scene is truly stunning, the use of lighting, architecture, and natural assets provides so much depth, creating a mystical and enchanting aesthetic. The artist thoroughly demonstrates the technical and artistic process of his work and how he achieved the final result.
Style and Inspirations
The artist has shown in his work a passion for outdoor landscape level design in Unreal. He builds beautiful outdoor scenes, which usually contain natural elements such as lakes, trees, paths, and an architectural element. He has made two levels in Unreal based on Japanese architecture and inspired by Japanese concept artwork. He made the project Samurai’s Path which reflects a similar Asian inspired theme. The artist has a very high standard of quality and all of his work looks extremely crisp and professional.
Technical Point of View
The artist demonstrates a strong use of technical skills to reach the final artifact. Such skills include; producing clean and effective cinematic sequences, photographic composition, and creating depth in the high rendered screenshots. 3D Asset generation such as 3D modeling, texturing, and positioning in the scene. Creating an atmosphere in Unreal and using post-processing effects and lighting the scene to complement assets. The artist is strongly experienced in building landscapes and scenes in this software, showing a high level of the required technical skills required for my project.
From an artistic point of view, this artifact is beautiful. The complementary lighting, elements, and effects bring the scene together, from the choice of architecture to the selection of trees. The cherry blossom tree is an effective touch in adding color to the scene, as well as contrasting with the traditional colors of nature and greenery. The warm lighting of the sun hits the temple in a soft way, creating an attractive shadow and level of depth to the architecture. The scene is both magical and realistic at the same time. The positioning and level of detail in certain assets make the scene look real, yet the picturesque setting it creates connotates with a mystical oriental forest that would appear in a game or animated film.
Both the artistic and technical aspects of this artifact stand out to me, therefore being my main inspiration. When I saw this project, I instantly fell in love with it and wanted to create something like this myself. This piece of work strongly impacted me and gave me a sense of excitement to build a scene in Unreal. The thing that inspired me the most is the peaceful and pleasant emotions that came alongside watching the cinematic video. The visuals and soothing audio created a sense of comfort and relaxation. Therefore creating a digital meditation space.
What is the relevance to me?
This artifact relates to my skill area and focus, being the Unreal Engine and scene/ level building. My main intention is to produce a digital meditation space, therefore I will use this as an example of the final result.


 (Figure 1): https://cdna.artstation.com/p/assets/images/images/023/327/808/original/tomas-brezik-webp-net-gifmaker.gif?1578859387