Bibliography

Blender. 2019. First Steps – Blender 2.80 Fundamentals. [Video]. Available at: https://youtu.be/MF1qEhBSfq4?list=PLa1F2ddGya_-UvuAqHAksYnB0qL9yWDO6 [Accessed 7th Nov].

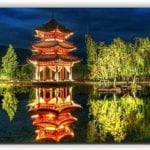
Březík, Tomáš. 2019. Japanese shrine. [Article] Available at: https://www.artstation.com/artwork/e0wwdG [Accessed 28th Oct].

Brisnehan, James. 2020. Creating a Festive Italian Village in UE4. [Article] Available at: https://80.lv/articles/creating-a-festive-italian-village-in-ue4/ [Accessed 28th Oct].

Cirillo, Marco. 2017. Practical Fingerstyle #1 Spanish Dance – Easy Spanish Melody for Beginners. [Video] Available from: Practical Fingerstyle #1 Spanish Dance – Easy Spanish Melody for Beginners – YouTube [Accessed 18th Nov].

DigitalTris. 2020. Realistic Forest Pack. Unreal Engine. Available at: https://www.unrealengine.com/marketplace/en-US/item/e09224763bef418ca376f4403362e8cc [Accessed 16th Dec].

Effects, Octopus. 2020. Learn Blender with me 9 – Create 3D model of Champa flower – 163. [Video]. Available from: https://youtu.be/8QBLXRJTcQg [Accessed 1st Nov].

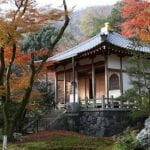
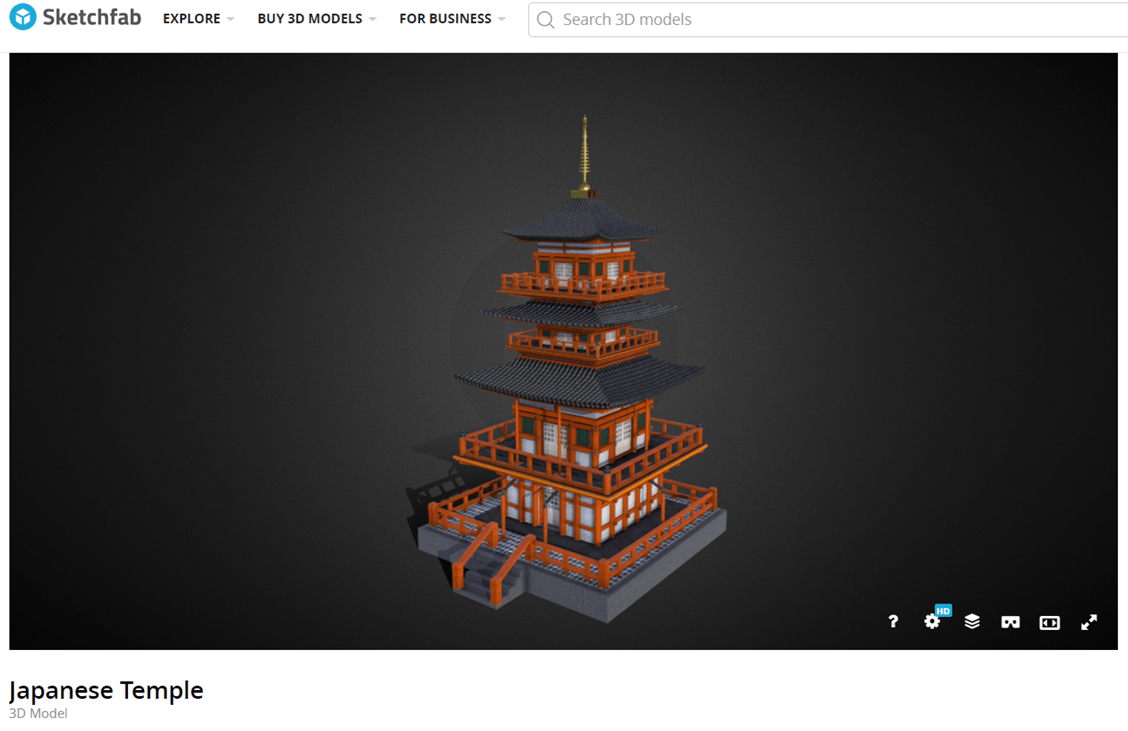
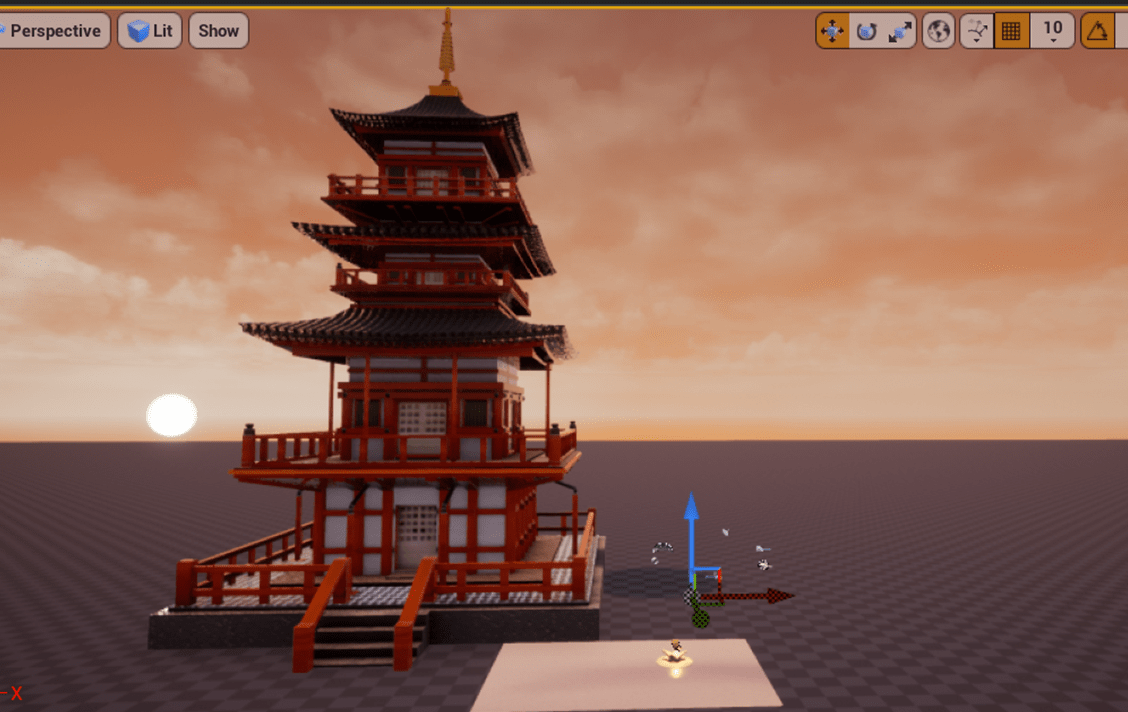
Galaxxxy. 2018. Japanese Temple. Sketchfab. Available from: https://sketchfab.com/3d-models/japanese-temple-5917e267ca3e48ac8a27f9ec5809fc29 [Accessed 11th Dec].

Gamefromscratch. 2019. Unreal Engine Procedural Nature Pack (+Good Skys) In Action — Now Free! [Video] Available from:https://youtu.be/jN9D5H-cQIY [Accessed 20th Dec].

Garth, Joe. 2019. Free Brushify – Environment Shaders Pack. [Article] 80LV. Available from: Free Brushify Environment Shaders Pack (80.lv) [Accessed 21st Dec].

Gregory, Paige. 2019. Paige Gregory Digital Media Project 2. [Blog] Available at: https://med2024m-1920-digitalmediaproject23.coursework.lincoln.ac.uk/ [Accessed 18th Nov].

Gregory, Paige. 2019. Software/ Hardware Review: Auto Materials and Alpha Masks (Brushify). [Blog post] Available at: https://med2024m-1920-digitalmediaproject23.coursework.lincoln.ac.uk/2020/03/20/auto-materials-and-alpha-masks-brushify/ [Accessed 21st Dec].

Gregory, Paige. 2019. Software/ Hardware Review: World Machine/ UE4. [Blog post] Available at: Software/ Hardware Review: World Machine/ UE4 – PAIGE GREGORY DIGITAL MEDIA PROJECT 2 (lincoln.ac.uk) [Accessed 21st Dec].

Guru, Blender. 2020. Blender Beginner Modelling Tutorial – Part 1. [Video] Available at: https://youtu.be/Hf2esGA7vCc [Accessed 1st Nov].

Harle, Thomas. 2016. Water Materials. [Video] Available from: https://vimeo.com/188064110 [Accessed 18th Nov].

Holmes, Jon. 2019. CG Texturing Workflow. Available from: https://spark.adobe.com/page/d5tNUfgdXieo3/ [Accessed 7th Nov].

Jayanam. 2020. Substance Painter PBR Materials To UE4. [Video] Available from: https://youtu.be/JMivdSYTUo8 [Accessed 18th Nov].

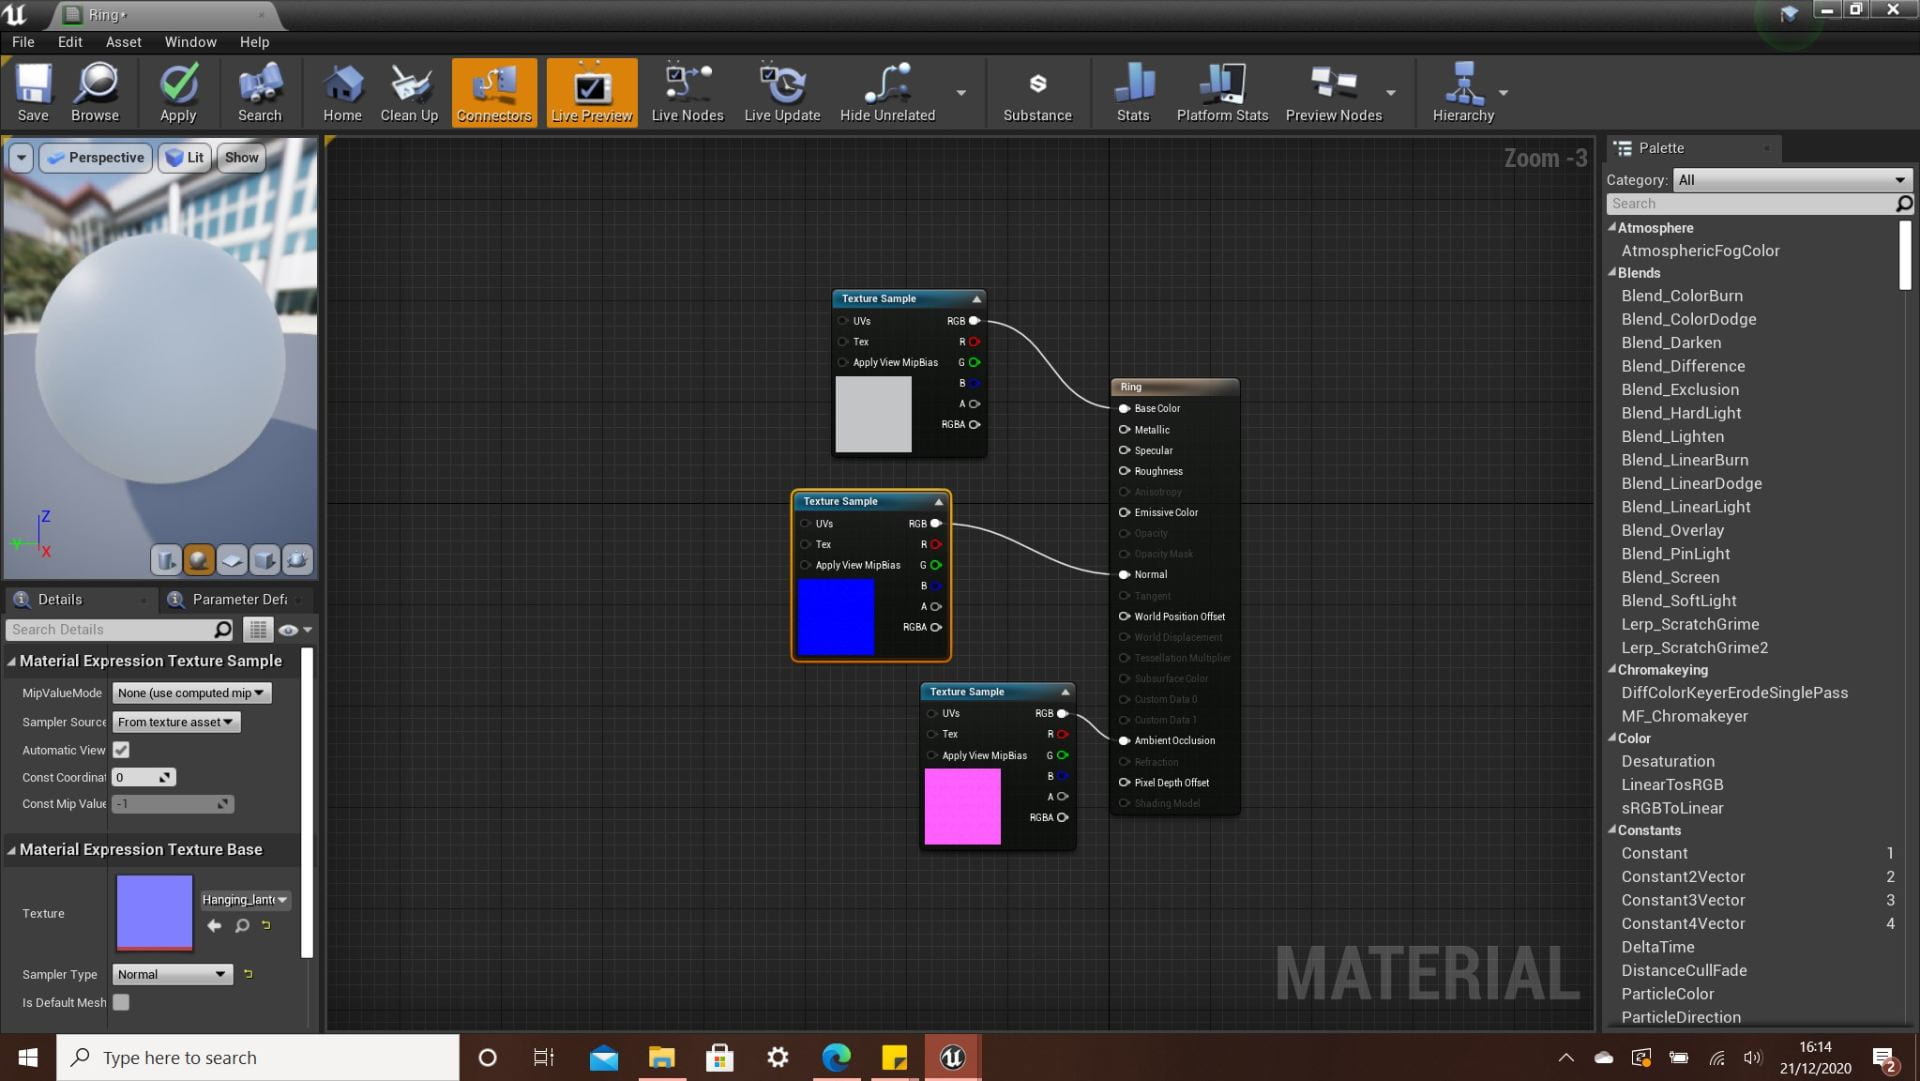
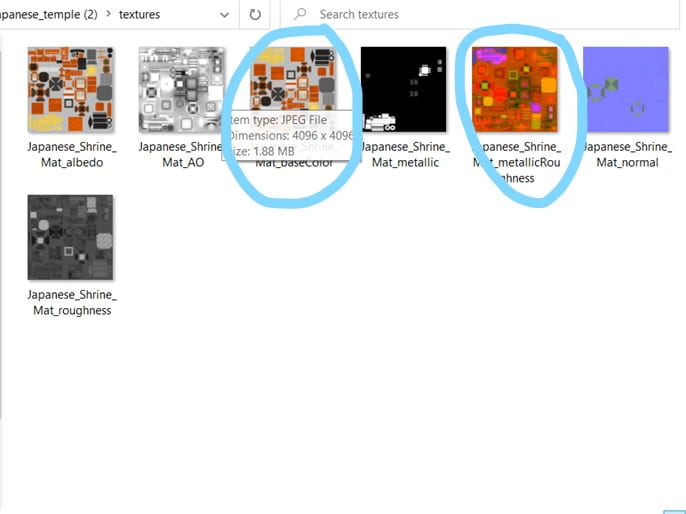
Kaisellgren. 2016. How to use diffuse, height and albedo maps? Unreal Engine. Available at: https://answers.unrealengine.com/questions/515755/how-to-use-diffuse-height-and-albedo-maps.html [Accessed 20th Dec].

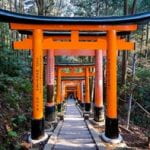
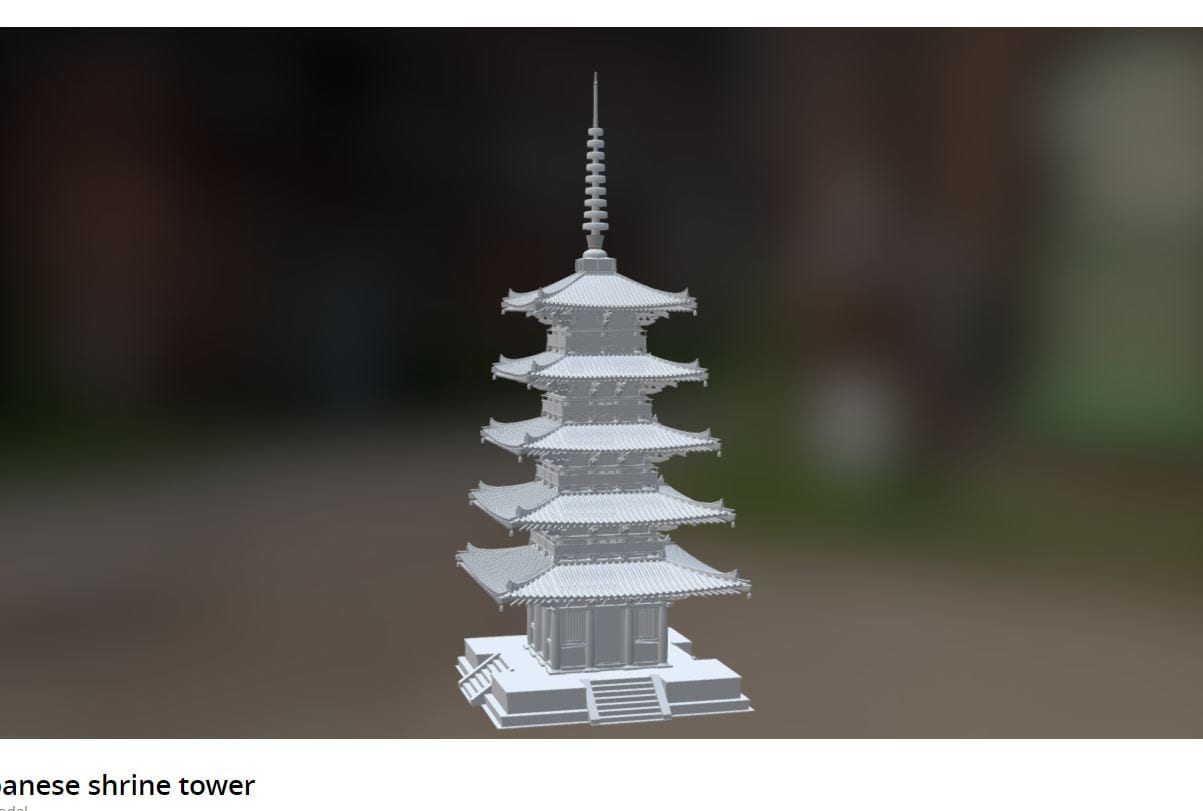
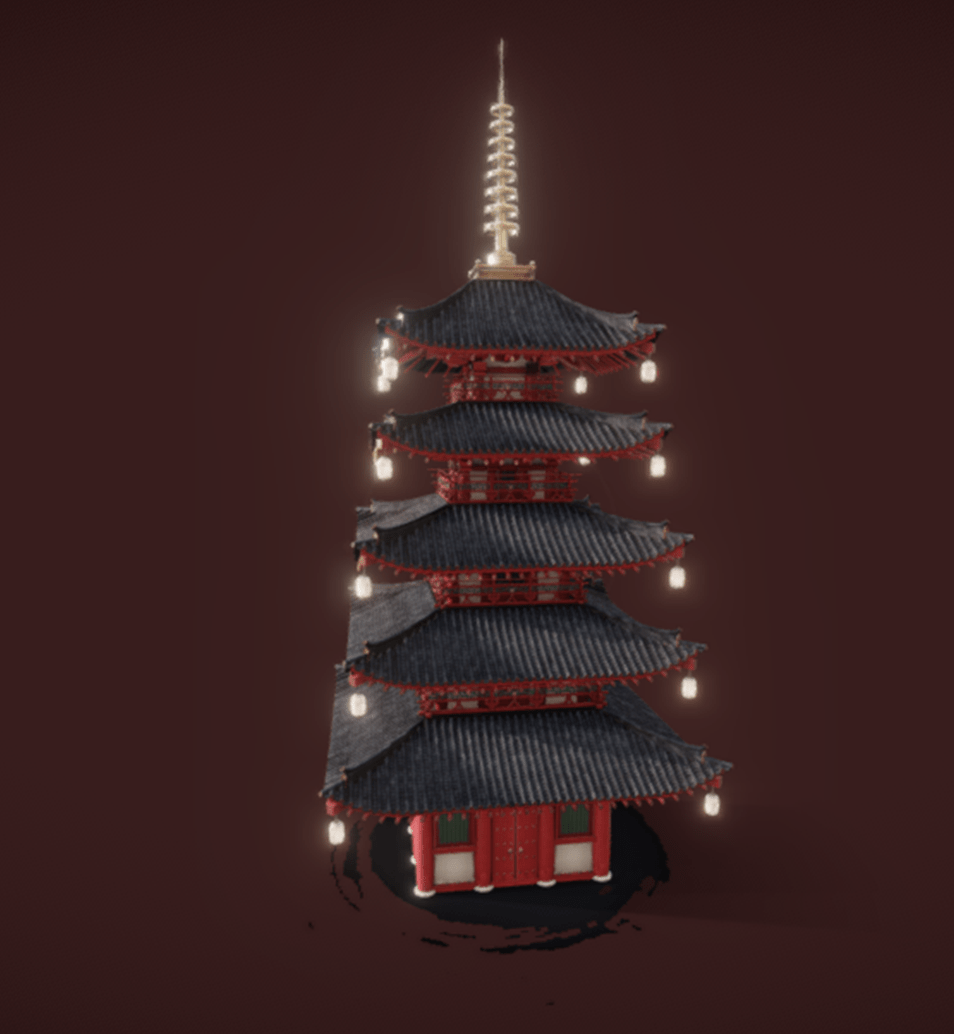
Kensaku. 2015. Japanese shrine tower. Sketchfab. Available from: https://sketchfab.com/3d-models/japanese-shrine-tower-e32f6547bb8d4479b90700d6d167829a [Accessed 10th Dec].

Lile, Darrin. 2016. Sculpting a Game Asset in Blender. Available at: https://www.linkedin.com/learning-login/share?forceAccount=false&redirect=https%3A%2F%2Fwww.linkedin.com%2Flearning%2Fsculpting-a-game-asset-in-blender%3Ftrk%3Dshare_ent_url&account=42436980 [Accessed 1st Nov].

Marshall, Warren. 2018. Arch Vis Polish Pack #2. Unreal Engine. Available at: https://www.unrealengine.com/marketplace/en-US/item/243ede3562a94ca99cf8bdc82d659587 [Accessed 6th Dec].

Megascans, Quixel. Megascans Goddess Temple. Unreal Engine. Available at: https://www.unrealengine.com/marketplace/en-US/item/f13bbc0c52ae42d595cd9c23fe605372 [Accessed 7th Dec].

Pathak, Jainesh. 2018. Japanese Temple. Sketchfab. Available at: https://sketchfab.com/3d-models/japanese-temple-a210febbec4f454dbd0df1d142be06bc [Accessed 10th Dec].

PlayStation. 2020. Ghost of Tsushima – A Storm is Coming Trailer | PS4. [Video] Available at: https://www.youtube.com/watch?v=RcWk08PBe7k [Accessed 28th Oct].

Protofactor Inc. 2018. Animal Variety Pack. Unreal Engine. Available at: https://www.unrealengine.com/marketplace/en-US/item/c661d0a956454ea4ba6d12c09a687406 [Accessed 3rd Nov].

PurePolygons. 2019. Procedural Nature Pack Vol.1. Unreal Engine. Available at: https://www.unrealengine.com/marketplace/en-US/item/3ac3264f11074097a888330e09d95968 [Accessed 3rd Nov].

Rzatkowski, Adam. 2020. Operation Claymore: Complete Workflow for an UE4 Scene. [Article] Available at: https://80.lv/articles/operation-claymore-complete-workflow-for-an-ue4-scene/ [Accessed 28th Oct].

SilverTm. 2020. Nature Package. Unreal Engine. Available at: https://www.unrealengine.com/marketplace/en-US/item/83513a07b2d947ef903075d3fd3edf69 [Accessed 14th Dec].

Studios, Treefort. 2019. Speed Environment – Winter Forest Cabin – Unreal Engine 4. [Video] Available at: https://www.youtube.com/watch?v=ofE0EZlP0I4 [Accessed 28th Oct].

Substance by Adobe. 2018. Substance Academy Series: Getting Started with Substance Painter. [Video] Available from: https://youtu.be/IGGQl9kVB1M?list=PLB0wXHrWAmCwnqWfKdGEmbtSKN2EzvLrY [Accessed 18th Nov].

Tharlevfx. 2018. Water Materials. Unreal Engine. Available at: https://www.unrealengine.com/marketplace/en-US/item/2ed5823f48fe41b5ae826841fe11b023 [Accessed 14th Dec].

Tirido. 2017. Scanned Poplar and Aspen Forest with Seasons. Unreal Engine. Available at: https://www.unrealengine.com/marketplace/en-US/item/c080b7986e6b46968fa4f97b50bafebc [Accessed 17th Dec].

Unreal Engine. 2018. Volumetric Fog and Lighting in Unreal Engine 4 | GDC 2018 | Unreal Engine. [Video] Available at: https://youtu.be/Xd7-rTzfmCo [Accessed 18th Nov].

Unreal Engine. 2020. Building natural environments in Unreal Engine. [Video] Available from:  https://youtu.be/gbj1qgPOl3E [Accessed 18th Nov].

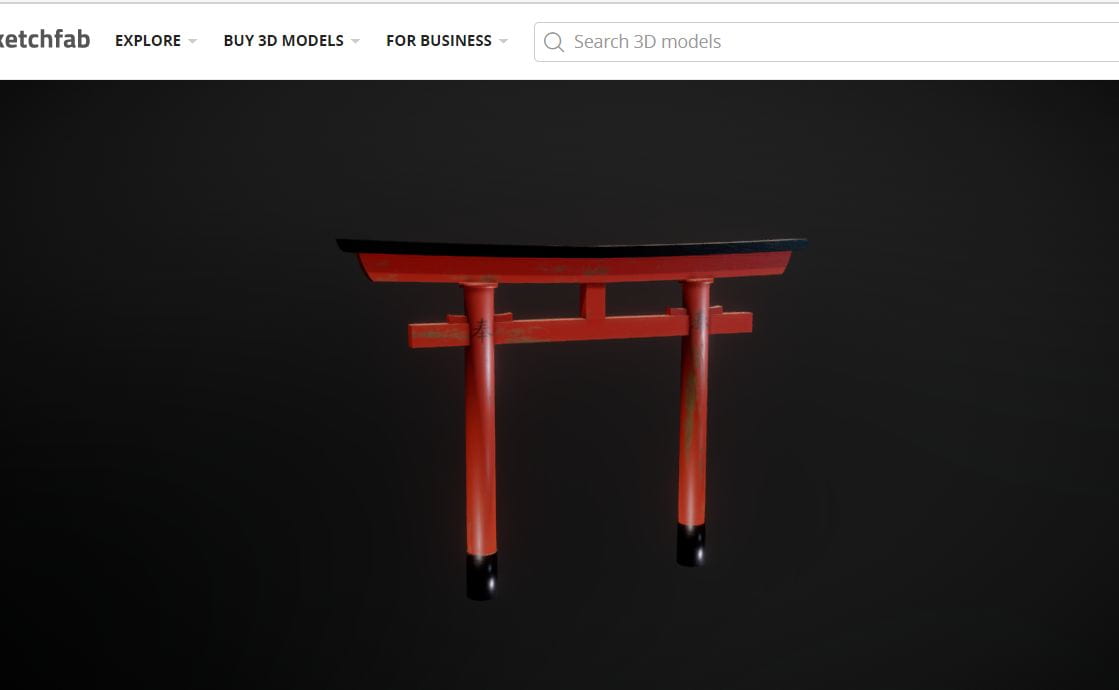
Virmani, Sahir. 2018. Japanese Torii Gate. Sketchfab. Available at: https://sketchfab.com/3d-models/japanese-torii-gate-2027a248de1b4b70985ff97e708fb50d [Accessed 11th Dec].

Glossary of Terms

The Glossary of Terms is an outline of technical and artistic terms used within the document.

3D Modeling- The process of developing a mathematical representation of any surface of an object in three dimensions using specialized software.

Alpha Masks- In computer graphics, alpha compositing is the process of combining one image with a background to create the appearance of partial or full transparency.

Bevelling- To add a curve and definition to a straight edge of a shape.

Cinematic Sequence- A sequence is a series of scenes that form a distinct narrative unit, which is usually connected either by a unity of location or unity of time.

Exporting- The process of converting a file to another format that can be used in other software.

Extruding- To pull/ expand something outwards.

Foliage Tool- Enables you to quickly paint or erase sets of Static Meshes or Actor Foliage on filter-enabled Actors and geometry.

Level Design- Involves the creation of video game levels, missions, and stages. This is done using a level editor – software used in game development to construct digital environments.

Level Sequencer- The “container” for your cinematic scenes, and must be created in order to begin working inside of the Sequencer Editor.

Material ID’s- A sub-object polygonal material selection. It is generally used to apply more than 1 material to an object without breaking it up into multiple objects.

Post Processing- Quality-improvement image processing methods used in video playback devices, and video players software, and transcoding software. It is also commonly used in real-time 3D rendering to add additional effects.

Sequence Editor- The cinematic editing tool inside Unreal Engine 4.

Texturing- the process of applying an image to a 3D model. Textures are the flat images that are applied to a model to give it color and detail.

UV Maps- The 3D modeling process of projecting a 2D image to a 3D model’s surface for texture mapping.

UV Unwrapping- It is the process of translating your 3D mesh into 2D information so that a 2D texture can be wrapped around it.


Project Reflection

What went well?

Regarding the practice of my project, I found that the areas which went well include having creative flexibility in the software of my choice and having complete control over the final artifact and subject area of specialty. Whilst experimenting with the software, I could decide which methods suited my needs the most and explore which path to take to achieve my desired result.

The area in my workflow which I found worked the best for me was the concept development stage where I gathered inspiration to produce an artistic vision for the style and mood of the final artifact. I then brought this to reality when I built the scene in the Unreal Engine using assets that emphasize the Asian inspired architecture and tranquil mood. I found using my technical skills to build a level in Unreal to be the section that I found the most enjoyable, as I was given creative flexibility and I was able to bring my vision to life.

In relation to my learning outcomes, I think my skill development in relevant software worked well because I challenged myself and managed to learn skills in not only the Unreal Engine but also Blender and Substance Painter. I have not only built an in-depth and highly detailed scene in Unreal which focuses on a variety of areas such as opening a project in Unreal, adding assets into a level, building a landscape, adding layer blend files and painting the terrain, foliage tools, alpha brushes for sculpting, building water planes, material IDs and texture maps, post-processing and lighting, fog, cinematic cameras, and the level sequence editor, etc. But I have developed new skills in 3D modeling which includes modeling the object, smoothing the object, UV map unwrapping, and exporting as FBX files. Then I went onto the texturing process which includes adding material IDs, painting, and exporting the texture maps for the Unreal Engine.

From my key findings, I have researched a lot about my specific discipline which has provided me with essential knowledge about industry standard practice and software. I have useful insight into game level design in the Unreal Engine from case studies and my critical analysis. From this research, I now understand the artistic and technical process of building high quality, industry-standard work in my chosen sector.

What did you find challenging?

The area I found the most challenging regarding my practice was problem-solving any technical issues with software/ hardware and understanding the technical terms, processes, and solutions for any issues encountered. There were a few times where, due to my level of knowledge and experience in the software, I was unsure what the actual issue means and I was so unsure that I did not even know what/ who to ask for guidance. One example of this is where I was editing the final sequence in the Unreal Engine and the video exported as an AVI file, and for some reason, the built-in media player on my laptop would not play AVI files, meaning that I needed to preview the renders in Premiere Pro. I then edited the renders together and exported the final sequence in the format for YouTube 1080p. My laptop still would not play the video and I kept having an error screen appear. I tried so many different things such as, exporting renders as a png image sequence and importing that into Premiere, finding an online video converter to convert the AVI to MP4 but nothing worked and I was worried I would not be able to use the final render with the guitar. In the end, I thought to upload it to YouTube anyway because if it played in Premiere Pro, maybe it would work in the YouTube player. This worked, which meant I could just upload the original export in the end. This taught me to try everything and not give up.

Regarding my overall workflow, I found keeping within the time deadline challenging because I pushed myself to learn new skills and software, and I was worried I would run out of time, in case I encountered more issues than expected or struggled understanding how to use the software. From my timescale of the whole project, I did manage to complete everything I wanted to, which includes building the level and making my own 3D assets. If I had more time I would have been able to experiment more and create better/ more assets that complement the scene. Such as building my own temple, or modular building pieces.

The most challenging learning outcome for me was documenting all of my work effectively. When I have projects which require hours and hours of digital work, it is difficult to get into the habit of recording every step and areas which I find the easiest I tend to forget to recognize and include this into my research. Therefore I decided to use a screen recorder to keep track of everything I do. I thought using voice narration over it would be an easier way to explain what I have done and my thought process behind it. I am glad I did this because it is a useful habit to have when reflecting on my learning process.

Strengths and Weaknesses

My strengths are designing artistic scenes in Unreal with careful asset placement for photographic composition and using post-processing, lighting, and fog to build an attractive environment that creates a mood. Another strength is the organization of my research, development to ensure a clean and accessible method of supporting my work. One strength that has helped me overcome boundaries and get to my final result is by challenging myself and following the process till I reach my desired result and not giving up when it gets tough. I found that I am good at problem-solving through experimentation to find an alternative solution.

Some of my weaknesses include working in a tight timeframe and still maintaining a high level of detail at a high quality and industry level. Due to being a perfectionist, I had very high expectations and found it difficult to maintain this in a shorter timeframe, therefore challenging me to either sacrifice aspects or work at a faster pace. To improve this I will research methods to increase the speed of my workflow and prioritize elements of my work.

R+D Conclusion

To conclude my Research and Development blog, I will bring together all of my findings from this project.

From gathering relevant research sources I have enabled myself to develop and learn new skills such as researching, reflecting, analyzing, and compiling knowledge and then applying it to my own work. I used visual influences such as mood boards, case studies, and images for artistic inspiration which is reflected in my final artifact. From this, I took forward the skill to document my progress through screen recordings, screenshots, and frequent write-ups, then allowing me to look back and reflect on my development and growth.

Using video tutorials, case studies, articles, and previous findings working alongside practical experimentation, I have learned how to use new software such as Blender, Substance Painter, and the Unreal Engine. Such required software has given me the opportunity to practice skills in 3D modeling, texturing, and level design.

All of these skills combined, resulted in a high-quality level design in Unreal, using a variety of custom and sourced assets, and finally bringing all of these elements together in a cinematic sequence.

Unreal Scene Development


Audio for Scene:

I wanted to add a personal touch to the scene and add original music. I play guitar so I wanted to incorporate this skill into my project somehow, so I learned a slow fingerstyle song and played it on my guitar, and recorded it. The song I played should complement the peaceful and tranquil mood which I aim to create from the scene. The tempo is slow and the song is in an acoustic fingerpicking guitar style. The music will help add emotion to my artifact and deepen the connection with the audience.

I found an audio file for a bird sound effect. Available HERE

Unreal Scene Building Video:

What have I learned?
  • How to add assets into a project in the Unreal Library
  • How to start a project in Unreal
  • How to build a landscape
  • Using the Brushify pack to paint the landscape
  • Adding Layer Blend Files
  • Using the Brushify alpha texture brushes to sculpt a terrain
  • Adding foliage
  • Adding 3D assets into Unreal
  • Creating ponds/ lakes using water plains
  • Material IDs and texture maps
  • Post-processing and Lighting
  • Adding fog
  • Cinematic cameras in Unreal
  • Level Sequence Editor
  • Editing and recording a cinematic sequence
What did I find challenging?

What I found the most challenging was getting everything to load correctly and ensuring that I could create the scene similar to my artistic vision. I also found a few technical issues with finding the tools due to the updated version of Unreal. Although I managed to figure it out in the end with help of watching tutorials and the videos of my previous work, and generally practicing and exploring within the software.

What can I do to improve?

To improve this, I could learn how to create reflections on the water plains and make the lanterns flicker to add more depth to the details. I could also learn how to animate flying birds in the air.

What do I like about it?

I really like the way this turned out, the post-processing and exponential height fog made a massive impact on the finished artifact. It adds a realistic and beautiful effect that compliments the intentions of building a digital meditation space.

3D Asset Development

3D Assets Sketches (References)

I want to experiment with 3D modeling in this project, as I have never had the chance to incorporate my own assets into an Unreal Scene. I wanted to add a few elements which would add to the meditation and zen atmosphere, therefore I decided to create some Chinese-inspired lanterns. I wanted to try out 3 different styles of lanterns such as a hanging lantern, a floating water lantern, and a traditional wooden floor lantern.

As this is my first attempt at 3D modeling and texturing, I thought, if I made three different assets, it might give me a variety to chose from.  Also, if one of them doesn’t meet the level of quality, or doesn’t look how I want it to, I can then just use my best asset.

I created some sketches to reference my 3D model experiment (using external references from Google Images). I drew these on ProCreate on my iPad, here is what they look like, I have also included the sketch process video:

(Figures 39-41)

Reference images:

Here are the reference images I used to draw my assets, I found all three of them on Google Images.

(Figures 42-44)

3D Modeling and Texturing 

The first model I created was the hanging lantern, I started off watching a few tutorials, and mainly just played around with it, to get used to the UI and the feel of Blender. I found the overall modeling process fairly easy, with a few issues and minor stresses along the way.

I had a meeting with my module lecturer and set a deadline to complete all of the 3D models ready for the next meeting so that he could advise me on the next step. This was very helpful as it allowed me to ask more questions, and the guidance was specific to my work and project. Whereas by using YouTube tutorials, it was harder to problem solve and fix any minor issues I’ve had, as they are only demonstrating their project, not mine.

With YouTube tutorials, I had to gain knowledge from what I’ve seen, then apply it to my own project and hope for the best, whereas having an online meeting, where my lecturer went through the work I have done and gave me an example of what I needed to do was very beneficial to my project and learning development.

Meeting recording: 

What did I learn from this? 

  • How to merge objects using Ctl M or Ctl J
  • Bevel Edges Modifier
  • Smoothing
  • Auto Smooth Option
  • Applying all transforms
  • Applying modifiers
  • Creating material ID’s for each section
  • Smart UV Unwrapping
  • Exporting FBX for Substance Painter and Unreal
  • Recalculating the outside normals mesh
  • Starting a project in Substance Painter
  • Using Smart Materials
  • Smoothing out the petals
  • Using the solidify modifier
  • Exporting textures for Unreal in Substance Painter
Hanging Lantern modeling and texturing process video:

I recorded the process of building and texturing each asset so that I could look back on the process, and see what I have done. This allows me to visually see my learning process and how my skills have developed, as I come to learn more and practice those skills.

I have narrated over the video explaining what I am doing in each section and my thought process.

 Material Nodes for Unreal:  

(Figure 45)

What did you find hard?

I had a lot of issues with this, being my first attempt. As shown in the video, I had a few small issues getting used to modeling and the hotkey shortcuts. The main issue which I found the hardest/ most stressful, was in Substance Painter. I struggled with exporting textures for Unreal. I did not realize that you had to export three different texture maps for every material ID. I watched a few videos on how to export textures for Unreal in Substance Painter and in the video they only exported three textures in total, whereas I had a lot more than that so I got very confused. This was because they had the materials for the 3D model all in one material ID so they only needed to export that to plug into the material for the 3D model in Unreal.

What I soon figured out, by going into Unreal and bringing in the FBX model I exported in Blender, is that each material ID (part of the model) has its own material, which I can then plug the texture maps into in Unreal. Then everything clicked and it made sense and the whole process seemed a lot less stressful.

What do you wish you could do better?

To make it better, I could add textures to the lantern such as oriental patterns to make it look more detailed. I could also add a paper shader to it to make the light shine through the lantern.

What do you like about it?

I am happy with how it turned out, especially for my first attempt at modeling and texturing. I am confident that it will fit in with the scene and complement the scene.

Water Lantern modeling and texturing process video:

What did you find hard?

I found the water lantern the most difficult 3D asset to model due to the unique shape and advanced structure. The area I found most difficult is creating the petals, although I watched a video that helped me create that shape, therefore making the process a lot easier. I found a lot of issues with this model in Substance Painter. For some reason the materials did not want to wrap around the map correctly, resulting in stretched materials, this looked very unrealistic and unpleasant. I couldn’t figure out what the issue was, I tried realigning the normal maps, and UV unwrapping again but I currently do not have enough knowledge to troubleshoot this particular issue. Also, this was a challenge for me because I didn’t know what the actual problem was, therefore I did not know what to search for to find a solution. To solve this issue I ended up just adding a fill layer and then altering the settings of the color, roughness, and metallic to create the desired look. This prevented the visual tearing and stretching which came with the smart materials.

What do you wish you could do better?

To improve this, I would spend more time trying to understand the material issue and then work with alpha masks and brush tools to create more detail into the model.

What do you like about it?

I do like how the flower shape turned out, as it looks nice with the point light in Unreal, I think this asset will complement the scene nicely, maybe on the ground or floating in some water.

Floor Lantern modeling and texturing process video:

What did you find hard?

I found the floor lantern to be the easiest 3D asset due to the simple block shapes, the most challenging part was creating the lightbulb shape. This was the asset I am most confident with, although I did have to get used to some things such as aligning normal maps to prevent any errors in the model while opening it in Substance Painter. Also, I should have separated the bulb and the bulb holder in Blender because I ended up painting separate materials in Substance Painter, although this did teach me how to use paint layers and the brush tool.

What do you wish you could do better?

To make this better, I could have figured out a way to make the light bulb emit light, as a lightbulb does. Maybe if I have time I will look into this.

What do you like about it?

I am pleasantly surprised by how this turned out, I initially thought that this would look really bad when I brought it into Substance Painter because the lack of shadows made the materials look very strange. But when I brought it into unreal I liked how it looked with the atmospheric lighting and adding a point light added an extra touch, bringing light and depth to the scene.

Using the sourced Temple 3D Model and setting up the material nodes:

What did you find hard?

I have never used 3D models from Sketchfab for Unreal before, and I did not realize that all of the nodes and materials needed to be built together. I am used to using assets from the Unreal marketplace and Quixel Bridge which don’t require the texture maps to be plugged into the asset materials. The first temple was confusing me a lot because I thought I was missing something and was not plugging in the maps correctly, but as soon as I found that other people were having issues and that maps were missing it made sense so I found another model. The second model worked so much better but I did have to understand which maps to use, as there were 2 extra maps. I also downloaded another asset which was just a blank FBX file that can be used in Substance Painter. I thought maybe I could create my own material for the temple, but when I opened it in SP I found that there was only 1 material ID so I would have had to paint each section using the brush tool which would have taken a long time, which I didn’t really have.

What do you wish you could do better?

To make this look even better I could incorporate my hanging lantern with lights to add more depth to the model. It would be interesting to be able to make my own materials for this but I did not have enough time.

What do you like about it?

I like the way this temple looks in the Unreal engine and I think the temple is a necessary asset to create the oriental meditation space scene, as it adds Asian architecture to the level.

Concept Development

Initial Thoughts

Whilst in the first workshop, I started developing my ideas by writing down notes and mind maps in my notebook. In Figures 30 and 31, I wrote down visual ideas of an aesthetically pleasing scene I had in my head, and something I would enjoy creating. I was thinking about making a game for girls/ women who enjoy weddings and dressing up a bride, as it is an escape from reality and links to nostalgia and childhood fantasies, bringing the aspect of the magical dream wedding to reality. I also thought this could be used for wedding planners to create the perfect wedding digitally to then give to clients for feedback. My issue with this was that the target audience is very slim as it would mainly be for the female audience and only people who enjoy weddings. I was torn between doing a UX/UI Product, as this is another area I am interested in, although my mind was always returning to Unreal and Environment/Level art.

In Figure 32, I thought of the idea to focus on building a scene in Unreal for this project, then for a later project, I could create a showreel/ UX product to showcase my work in Level Design. This would join both areas I was torn between and also be beneficial for after my degree when I need to show my work to employers. I could record elements of me creating the scene and use motion graphics to create an explainer video and introduce my showreel. Then I could make a website/app to feature all of my Unreal Engine work. I even created a mini Storyboard so I don’t forget this idea.

Regarding this project, I want to create a digital meditation space in Unreal. I thought this would be a pleasant scene to create and hopefully provide a calming sensation for viewers. I can showcase the scene by creating a cinematic sequence that will be an enjoyable viewing experience. The level could also be used as a setting/ location for a game later on.

I gathered some imagery to attempt to capture my artistic intentions during the workshop, as I didn’t want to lose the idea from my mind.

I created a mood board, explaining why I have chosen such imagery as inspiration. Click here

Campfire Pitch

Summarise the concept into a paragraph
My concept is to create a cinematic scene/ level using the Unreal game engine. I want to explore available assets and develop my technical skills to create a high-quality scene, which could be used for a potential game setting.
Who your concept is targeting & how it will meet needs/expectations?
I am targeting possible employers in the gaming industry. Their needs and expectations are for me to demonstrate a high level of research and development skills, in partnership with technical skills and the willingness to experiment to create a high-quality artifact. I will meet these needs and expectations by demonstrating strong evidence of research and progression, for example, watching tutorials and practicing for myself, then visually capturing my progression.
How this concept will push your creativity and technical ability?
This concept will allow me to explore the endless possibilities within the Unreal game engine, allowing me to have creative flexibility within this process, as well as advancing my knowledge and technical skills within game level design.
How is this concept pushing the subject area it belongs to?
By creating a scene/ level in Unreal, it allows me to explore other skills such as; architecture, design, research, 3D design, understanding the ‘real’ world, and how to bring this knowledge into the process of creating a realistic scene, etc.
Would your project benefit from collaboration with your peers within Digital Media or outside?
I want this project to represent my artistic and technical skills through a visual product, so I think that I would benefit more from working individually, rather than in a team. Although it would be beneficial for me to collaborate with my peers for feedback and inspiration.

Asset Resources

I have found a variety of accessible and free assets that I think would work well with my project.

Procedural Nature Pack Vol.1

(PurePolygons, 2019) (Figure 16)

I thought I could use the water and foliage assets from this pack for my own project, as it matches the forest/ river aesthetic which I intend to create. I also think this could give me a lot of creative flexibility as it uses branches and stems to create unique structures.

ANIMAL VARIETY PACK in Characters

(Protofactor Inc, 2018) (Figure 17)

Nice Assortment of 5 animals to populate your projects.

I can use animal blueprints and animations to bring life to my scene and add more depth and natural elements such as animal life. This also matches the forest theme.

Scanned Poplar and Aspen Forest with Seasons

(Tirido, 2017) (Figure 18)

Here are some more tree/ foliage packs which I could use, this is a good pack as it includes different assets based on seasons, so I can create a winter, autumn, spring, or summer scene.

Nature Package in Environments 

(SilverTm, 2020) (Figure 19)

This is a beautiful pack and the assets are fairly new, as it has recently been added for free to the Unreal Marketplace. The quality is very high and it looks very realistic and visually appealing.

Water Materials in Materials

(Tharlevfx, 2018) (Figure 20)

I thought this pack would be beneficial as I do intend on adding water to my scene, maybe as a river or a lake. This pack gives me some interesting water materials.

Realistic Forest Pack

(DigitalTris, 2020) (Figure 21)

I have previously used this before in other projects, therefore I am comfortable using this pack. I think they are very beautiful trees and look stunning in the light and fog.

Megascans Goddess Temple 

(Megascans, Goddess Temple) (Figure 22)

This pack appealed to me a lot due to the warm lighting, as it creates a sense of comfort and a soft lighting effect which I can incorporate into my scene.

Arch Vis Polish Pack #2

(Marshall, 2018) (Figure 23)

This also follows the soft lighting theme and allows me to add more depth to the project.

Japanese shrine tower 

(Kensaku, 2015) (Figure 24)

Here is a temple that I found on Sketchfab, although does not have any materials, therefore giving me an opportunity to create my own texture maps.

Japanese Temple

(Galaxxxy, 2018) (Figure 25)

This is a very high-quality temple also found on Sketchfab and would complement my scene nicely, following that Japanese architecture style.

Japanese Torii Gate

(Virmani, 2018) (Figure 26)

This gate could add a smaller, and more impactful touch to the artifact, as it is not too big and can be used to accentuate certain areas of the scene.

“Japanese Torii Gate” by Sahir Virmani is licensed under Creative Commons Attribution. https://skfb.ly/6RISt To view a copy of this license, visit http://creativecommons.org/licenses/by/4.0/.

Japanese Temple

(Pathak, 2018) (Figure 27)

This temple is subtle, yet bold enough to be a key element to the scene. Focusing on Japanese architecture, this model will bring a lot of detail and personality to the scene.

“Japanese Temple” by Jainesh Pathak is licensed under Creative Commons Attribution. https://skfb.ly/6Twyt To view a copy of this license, visit http://creativecommons.org/licenses/by/4.0/.

How to use diffuse, height, and albedo maps? 

(Kaisellgren, 2016)

(Figure 28)

(Figure 29) Here is a picture of the temple rendered in realtime in the Unreal Engine, with the materials and texture maps plugged in.

Substance Painter Learning Resources

(Substance, 2018)

What it is and what did you learn? 

This resource is a video tutorial series for beginners, understanding the basics of using Substance Painter. From this tutorial I have learned:

  • How to start a new project
  • How to access texture material IDs
  • How to use fill layers and paint layers
  • Navigation hotkeys
  • Smart materials
  • Exporting texture files for Unreal

How it will help you with your intent and desired output?

This tutorial will help with my output as it teaches me how to use the required software and increase the speed of my workflow, therefore allowing me to have a higher quality of work and knowledge. This means I am able to have assets with better textures and materials.

How it measures up against industry use of the tool/skill?

This series is made by the official Substance Painter account, meaning that it is the industry-standard method of using this software.

(Jayanam, 2020)

What it is and what did you learn? 

This resource is a Youtube tutorial that taught me how to export textures and importing and plugging in the texture maps in the Unreal Engine.

How it will help you with your intent and desired output?

This helped me with my intent and desired output by teaching me the process from Substance Painter to the Unreal Engine, which is a vital part of the project, ensuring that I can use my custom assets in the level design.

Unreal Learning Resources

Unreal Engine Investigation (Level 2 Project Blog):

For my level 2 Digital Media project, I investigated level design in the Unreal Engine. In this project, I focused on gathering research and deeply looking into this subject area. I really enjoyed this as I explored some new skills and became more familiar with the software. This inspired me to go deeper into level design and even encouraged me to create my own assets. I have included the Project 2 Digital Media link to support my findings in this project, as I have reflected and used this blog throughout my project.

Level 2 Research Blog Link- (Gregory, 2019)

Brushify:

Free Brushify Environment Shaders Pack (80.lv) (Garth, 2019)

I previously used this pack when I was experimenting with the Unreal Engine and I want to use it in this project as I think it will help with my final artifact a lot as it enables me to easily build a landscape and paint on different materials and textures such as grass, mud, puddles, sand, rock, etc. It also comes with an alpha mask brush so I can create realistic mountains and hills while sculpting in Unreal.

Previous Experimentation:

Software/ Hardware Review: World Machine/ UE4  (Gregory, 2019)

This video showed me that using World Machine for the landscape heightmap was not the best solution for my project, regarding my timeframe, preferred result, and flexibility.

Brushify Experiment Link (Gregory, 2019)

In this video, you can see I used the Brushify pack to build the landscape. This was beneficial to my project as I can reference this when I come to build the landscape for my scene. The specifics I can use from this are:

  • Adding the landscape material to the level
  • Creating layer blend files
  • Using the alpha texture brush to sculpt the terrain
  • Painting different materials onto the terrain such as mud, grass, sand, etc


At the start of this video, I experimented with the foliage tool and importing assets into the scene. I learned how to add meshes to the foliage tool where you can alter the settings to make more realistic foliage and arrangement of trees, such as size, positioning, density, collision, etc. I also learned how to place singular assets such as rocks. I also wanted to add a river/ lake but hadn’t worked out how to make it look realistic yet.

In this experiment, I explored the achievability and realistic potential output I could create using free assets I have found through Quixel Bridge (Megascans) and what I have been given, such as the Brushify auto materials and alpha brush. I also used free music and sound effects online which I used for the output. I have attached the links below. I have recorded the process of creating this, similar to the tutorials by Maverick where I did not include a tutorial on how to recreate this, but visually shared how I achieved the final output. I thought this would help with my development because I could test how much I have learned through the tutorials and resources I had found. By trying it out, I am able to develop skills by practice, as well as research. It also made me feel more confident about my future projects, as I will be able to take what I have learned through this experiment and make it better. Also by experimenting, I can solve problems, which I may have not found from just watching a tutorial or reading about it.

I learned how to create a landscape, paint the landscape, and add foliage, import 3D assets, meshes, and animations. I also learned how to add lighting and fog effects, as well as playing around with the bloom/ post-processing settings which I learned in the Mountain House post, to make the scene stand out and look more aesthetically pleasing. I found the lens flare effect and added a slight flare to give it a little something extra.

Video Tutorials/ Resource Review:

(Unreal, 2020)

This tutorial is useful as it teaches all of the essential steps in creating a landscape-level design in Unreal.

(Unreal, 2018)

This video helped me learn how to use exponential height fog, lighting, and post-processing which positively impacts my work.

(Harle, 2016)

(Gamefromscratch, 2019)

This video explains how to use the Procedural Nature Pack. This would be beneficial if I used this pack for my scene.

(Cirillo, 2017)

I decided to learn a little guitar tune to add more depth and make my scene stand out. It would also contribute to my intentions of creating a digital meditation space.